Giới thiệu
The Polyend Step is a programmable 4-track drum machine pedal designed to provide rhythmic backing for musicians and guitar players. It offers a versatile and easy-to-use solution for practice, songwriting, and live performances. With a wide array of samples, customizable sequencing, and intuitive controls, the Polyend Step allows you to create unique and dynamic drum parts.
Các tính năng chính
- Programmable 4-track Drum Machine Pedal with 2,000+ Samptập
- 16-step Sequencing for detailed rhythm creation
- 350 Rhythms to choose from across various genres
- Stereo I/O for flexible connectivity
- 200+ Kits for diverse sound palettes
Hướng dẫn thiết lập
Follow these steps to set up your Polyend Step Drum Machine Pedal:
- Kết nối nguồn điện: Connect a 9V 200mA center-negative power supply to the power input port on the pedal.
- Kết nối đầu vào: Connect your instrument (e.g., guitar) to the L (MONO) or R 1/4" input jacks. For mono signals, use the L (MONO) input.
- Kết nối đầu ra: Connect the L (MONO) or R 1/4" output jacks to your amplifier, audio interface, or mixer. For mono output, use the L (MONO) output.
Hướng dẫn sử dụng
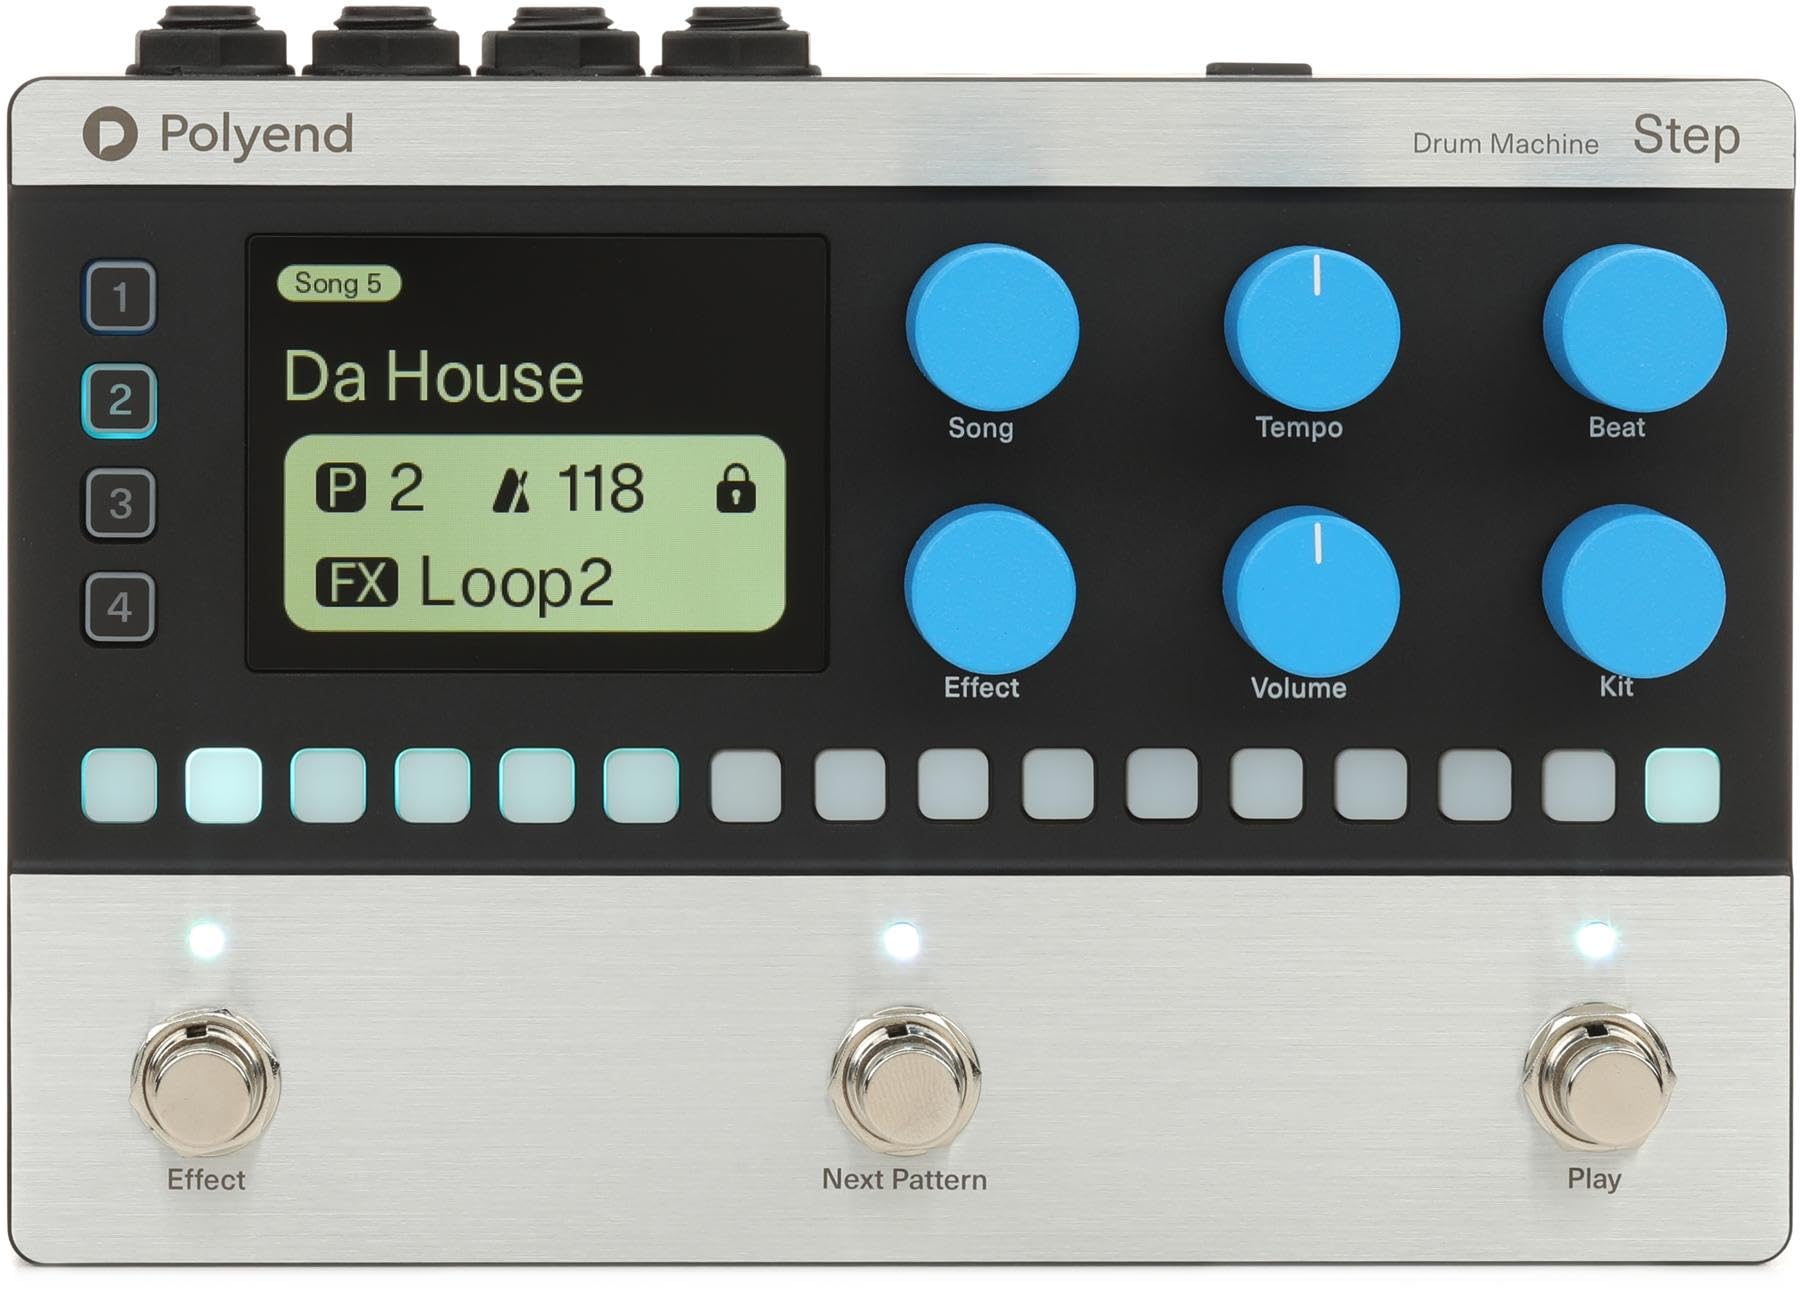
Kiểm soát hơnview
- Màn hình hiển thị: Shows current style, tempo, BPM, and other functional status information.
- GROUP/SAVE Knob: Switches to the group page, toggles parameters, adjusts values, and enters the slot save interface when held. In Tap Tempo mode, it adjusts BPM.
- SETTING/VOLUME Knob: Switches to the setting page, toggles parameters, adjusts values, and enters/exits global settings when held. It also adjusts the drum machine volume.
- FILL/TAP Footswitch (Left): Activates the fill function with a single tap. Enters Tap Tempo mode when held, allowing you to adjust playback speed by tapping.
- STOP/PLAY Footswitch (Right): Starts or stops drum machine playback.
Hoạt động cơ bản
- Bắt đầu phát lại: Tap the STOP/PLAY footswitch (right) to begin playing the selected drum pattern. The LED will flash red and blue at the current BPM.
- Dừng phát lại: Tap the STOP/PLAY footswitch (right) again to stop playback. The LED will flash white.
- Activating Fill: During playback, tap the FILL/TAP footswitch (left) to activate a drum fill.
- Adjusting Tempo (Tap Tempo): Hold the FILL/TAP footswitch (left) for one second to enter Tap Tempo mode. Tap the footswitch repeatedly to set the desired BPM. The LED will flash according to the new BPM.
- Changing Rhythm Patterns: Use the GROUP/SAVE knob to navigate through different rhythm patterns and banks. Turn the knob to select a new pattern.
- Điều chỉnh âm lượng: Use the SETTING/VOLUME knob to adjust the overall volume of the drum machine.
- Accessing Global Settings: Hold the SETTING/VOLUME knob to enter global settings, where you can adjust frequency response and other parameters.
Thông số kỹ thuật
| Tính năng | Chi tiết |
|---|---|
| Tên mẫu | Bước chân |
| Phong cách | Hiện đại |
| Loại đầu nối | Giắc cắm 3.5 mm, Giắc cắm 6.35 mm |
| Công nghệ kết nối | MIDI, Audio Jacks |
| Nguồn điện | Battery Powered (requires 9V 200mA center-negative power supply) |
| Jack cắm tai nghe | Giắc cắm 3.5mm |
| Nhà sản xuất | Đa giác |
| Trọng lượng sản phẩm | 2.83 pound |
| Kích thước sản phẩm | 11.4 x 5.65 x 3.6 inch |
| ASIN | B0F4MPRD1J |
| Số hiệu mẫu sản phẩm | RM |
| Vật liệu thân máy | Kim loại hoặc nhựa |
| Tên màu | đen |
| Loại vật liệu | Kim loại, Nhựa |
| Mức độ kỹ năng | Tất cả |
| Kích cỡ | 5.65 x 11.4 x 3.6 inch |
BẢO TRÌ
- Vệ sinh: Dùng vải mềm, khô để lau sạch bên ngoài bàn đạp. Tránh sử dụng chất tẩy rửa có tính mài mòn hoặc dung môi.
- Kho: Bảo quản bàn đạp ở nơi khô ráo, thoáng mát, tránh ánh nắng trực tiếp và nhiệt độ cao.
- Xử lý: Handle the pedal with care to prevent damage to knobs, switches, and jacks.
Xử lý sự cố
- Không có âm thanh: Ensure all cables (power, input, output) are securely connected. Check the volume settings on the pedal and your connected audio equipment. Verify the power supply meets the required specifications (9V 200mA center-negative).
- Hành vi bất ngờ: If the pedal behaves unexpectedly, try disconnecting and reconnecting the power supply to perform a soft reset. If issues persist, consult the manufacturer's support resources.
- Footswitch Unresponsive: Ensure the footswitches are clean and free from debris. If a footswitch is still unresponsive, contact customer support.
Bảo hành và Hỗ trợ
For warranty information, technical support, or service inquiries, please refer to the official Polyend webhoặc liên hệ trực tiếp với bộ phận chăm sóc khách hàng. Hãy giữ lại hóa đơn mua hàng để yêu cầu bảo hành.


