1. Giới thiệu
This manual provides detailed instructions for the setup, operation, maintenance, and troubleshooting of your Arducam USB 3.0 Camera. Please read this manual thoroughly before using the product to ensure optimal performance and longevity.
2. Sản phẩm hếtview
2.1. Có gì trong hộp
- 1 x IMX283 USB3.0 Camera Module with Metal Case
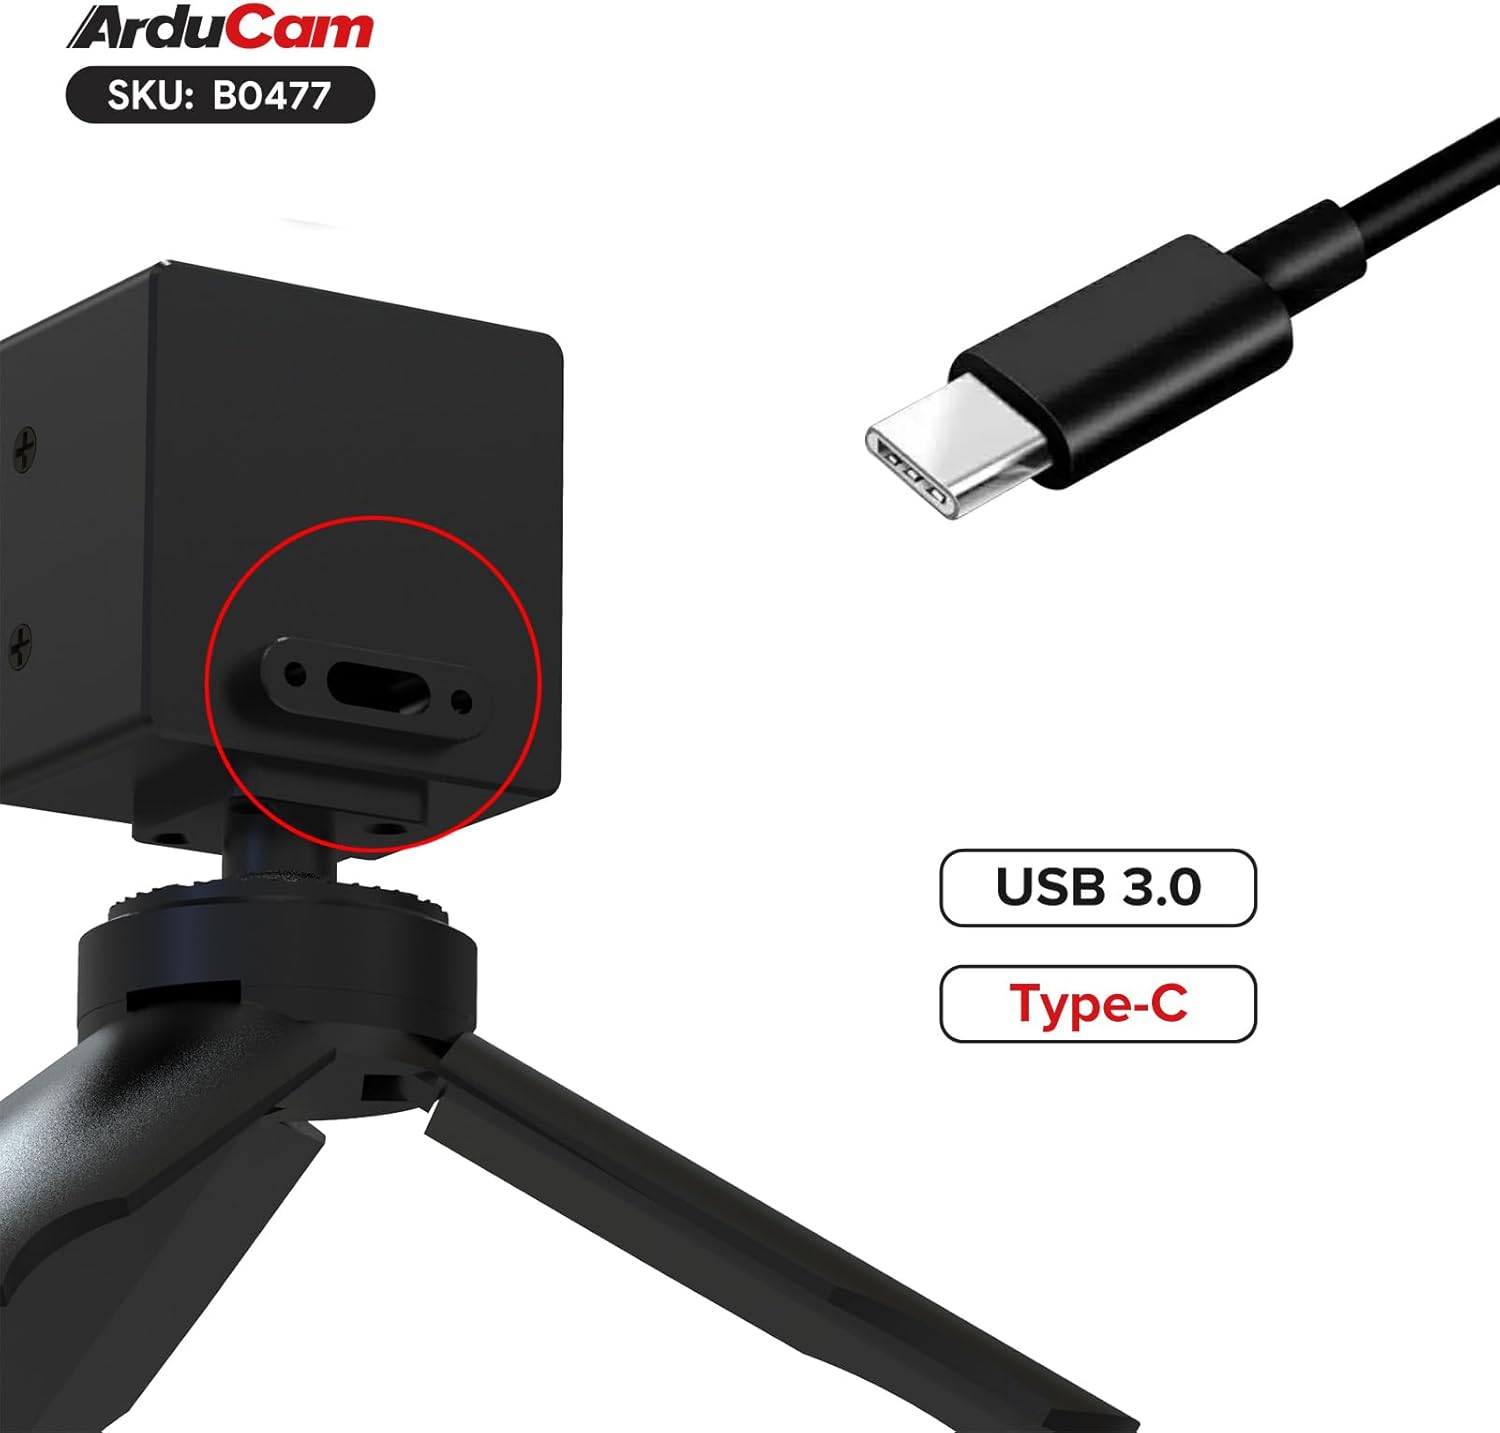
- 1 x 1m USB A to Type-C Cable
2.2. Các tính năng chính
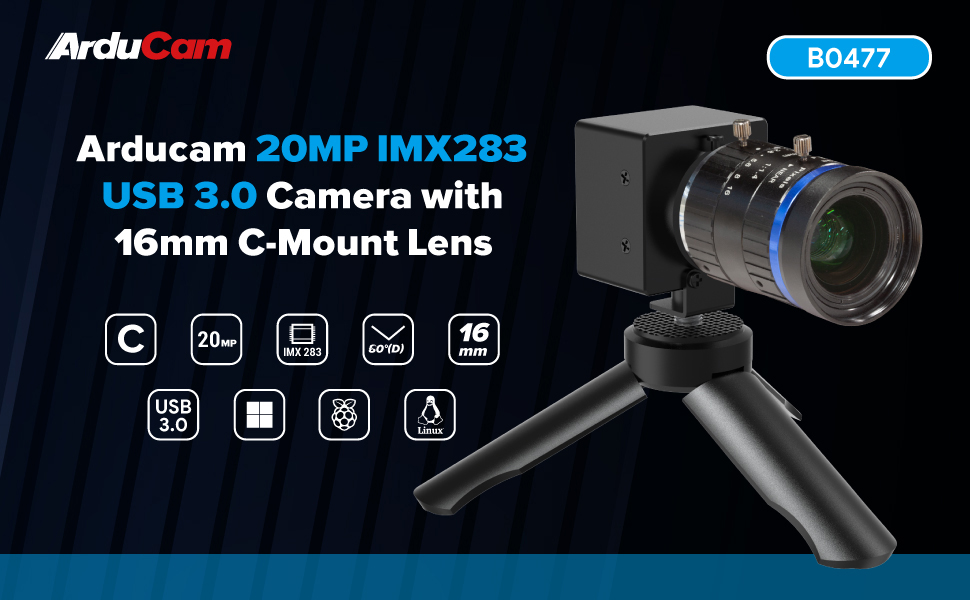
- Superior Imaging: Utilizes a 1-inch IMX283 CMOS sensor, achieving a maximum still resolution of 5472x3648 pixels.
- Flexible Frame Rates: Supports programmable frame rates, reaching up to 120fps at 720p resolution.
- Xử lý hình ảnh nâng cao: Features proprietary on-board ISP for image enhancement, including de-Bayer, gamma correction, BLC, AE, AWB, CCM, and RGB2YUV conversion.
- Telephoto Precision: Equipped with a 16mm C-mount lens, offering a 60° diagonal field of view (DFOV).
- Thiết kế cắm và chạy: Encased in a durable metal housing, designed for easy plug-and-play operation.
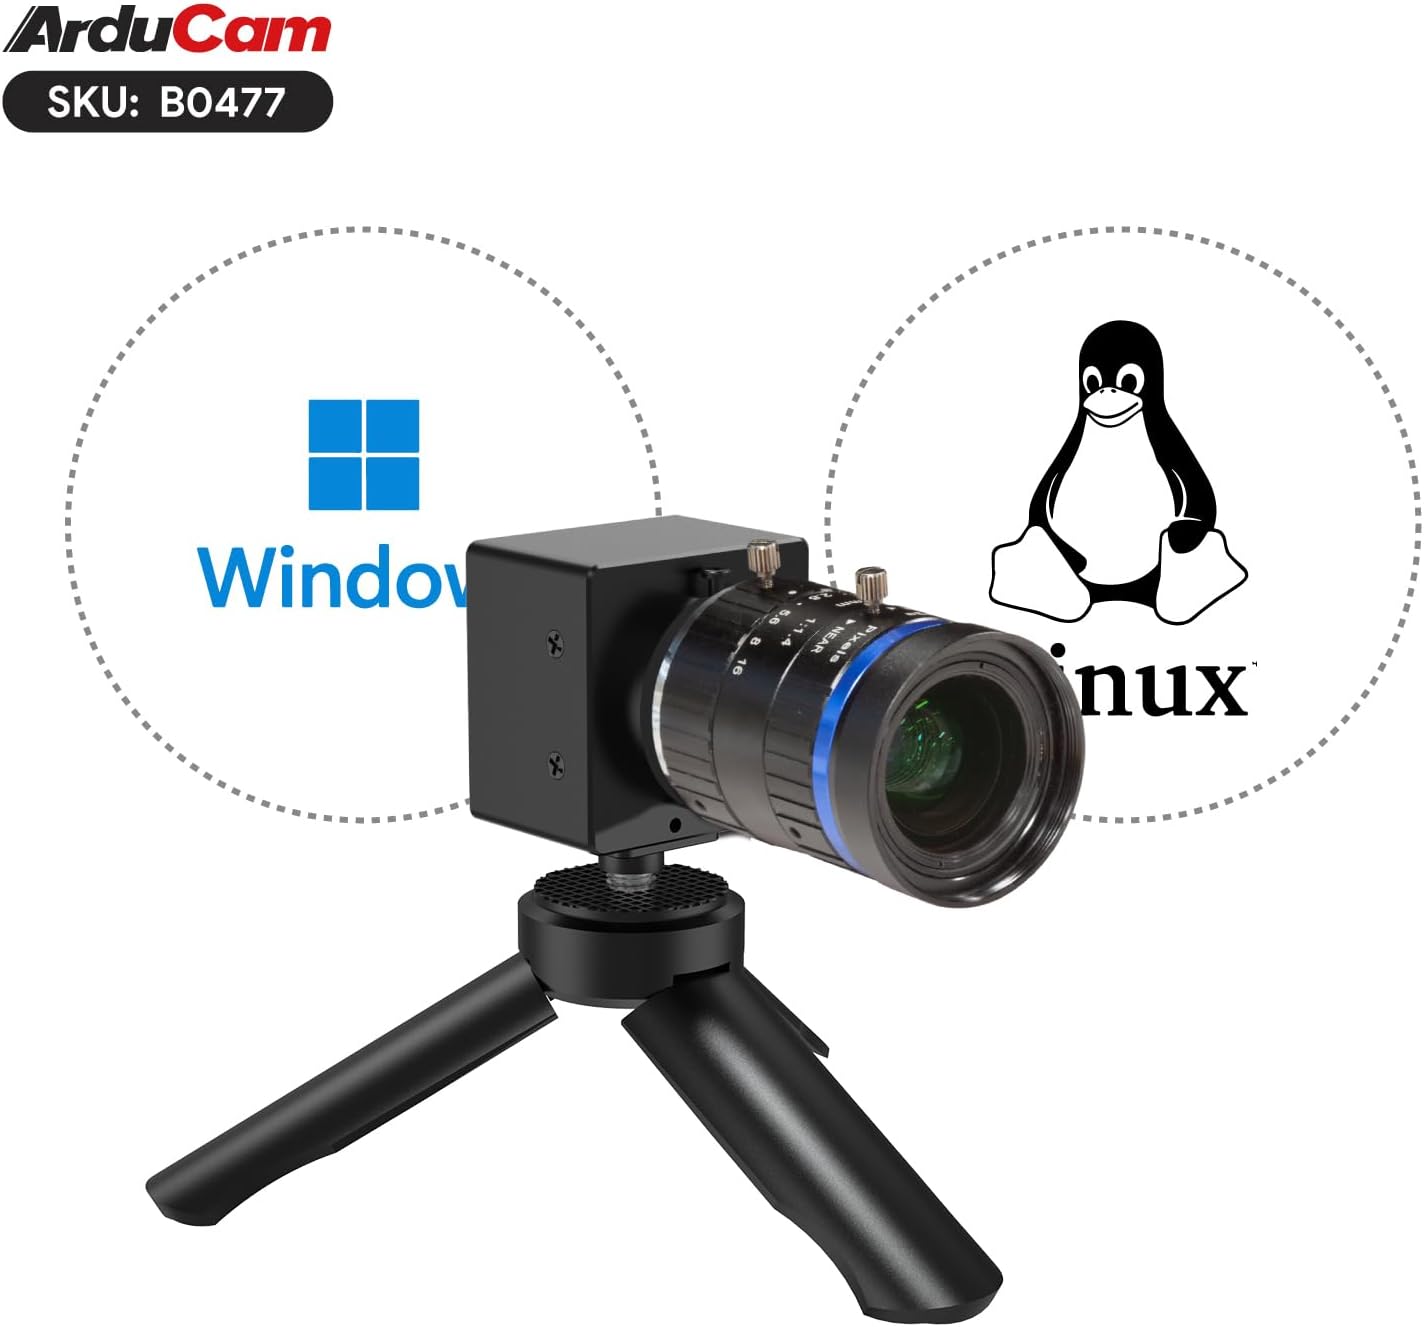
- Khả năng tương thích của hệ điều hành: Compatible with Windows and Linux operating systems.
2.3. Thành phần sản phẩm


3. Hướng dẫn thiết lập
3.1. Gắn ống kính
- Carefully remove the protective cap from the camera module's C-mount interface.
- Align the 16mm C-mount lens with the camera module's C-mount thread.
- Gently screw the lens onto the camera module until it is securely fastened. Avoid overtightening.
- Tháo nắp ống kính phía trước.
3.2. Kết nối với máy tính
- Connect the USB Type-C end of the provided cable to the camera module's USB 3.0 port.
- Connect the USB-A end of the cable to an available USB 3.0 port on your computer. For optimal performance, ensure you use a USB 3.0 port (typically blue).
- The camera is UVC (USB Video Class) compliant and should be recognized automatically by most operating systems without requiring specific driver installation.
4. Hướng dẫn vận hành
4.1. Basic Operation (Windows)
- After connecting the camera, open a compatible camera application (e.g., Windows Camera app, OBS Studio, AmCap, or Arducam's own software if available).
- Select the Arducam USB 3.0 Camera as your video input device.
- Adjust resolution, frame rate, and other image settings (exposure, white balance, gain) within the application's settings. The camera supports up to 5472x3648 resolution and 120fps at 720p.
4.2. Basic Operation (Linux)
The camera is designed to be UVC compliant for Linux. You can use standard Linux camera applications like Cheese, VLC, or OBS Studio.
- Connect the camera to your Linux system.
- Open your preferred camera application and select the Arducam camera as the input source.
- Configure video settings as needed.
Note: Some users have reported intermittent issues with the camera not re-initializing correctly on Linux after closing an application. If this occurs, try unplugging and re-plugging the camera, or restarting your system. Ensure your Linux distribution and kernel are up-to-date for best compatibility.
4.3. Điều chỉnh ống kính
- Tập trung: Rotate the focus ring on the lens to achieve sharp imagery at your desired distance.
- Khẩu độ: Adjust the aperture ring to control the amount of light entering the lens and the depth of field. A smaller aperture number (e.g., f/1.4) means a wider opening and shallower depth of field, while a larger number (e.g., f/16) means a narrower opening and greater depth of field.
5. Bảo trì
5.1. Vệ sinh ống kính và cảm biến
- Use a soft, lint-free microfiber cloth specifically designed for optical surfaces to clean the lens.
- For stubborn smudges, use a small amount of lens cleaning solution applied to the cloth, not directly to the lens.
- Avoid touching the sensor directly. If dust is visible on the sensor, use an air blower to gently remove it. Do not use compressed air from a can, as it can leave residue.
- Important: Some units may have dust or fingerprints between the sensor and its protective window from manufacturing. If this significantly impacts image quality, contact Arducam support.
5.2. Chăm sóc và bảo quản chung
- Bảo quản máy ảnh ở nơi khô ráo, không có bụi khi không sử dụng.
- Protect the lens with its cap when stored or transported.
- Tránh để máy ảnh tiếp xúc với nhiệt độ hoặc độ ẩm quá cao.
- Handle the camera by its metal case, avoiding direct pressure on the lens or sensor area.
KHAI THÁC. Xử lý sự cố
- Problem: Camera not detected or showing a black screen.
Giải pháp:
- Ensure the USB cable is securely connected to both the camera and a USB 3.0 port on your computer.
- Hãy thử cổng USB hoặc cáp khác.
- Khởi động lại máy tính của bạn.
- On Linux, if the camera stops working after closing an application, try unplugging and re-plugging the camera, or restarting your system.
- Verify that the camera is selected as the input device in your application.
- Problem: Image quality is poor or blurry.
Giải pháp:
- Adjust the focus ring on the 16mm C-mount lens until the image is sharp.
- Ensure the lens and sensor are clean (refer to Section 5.1).
- Check lighting conditions; insufficient light can lead to noisy or blurry images.
- Verify that the correct resolution and frame rate settings are applied in your camera application.
- Problem: Dust or spots visible in the image.
Giải pháp:
- Clean the front element of the lens.
- Use an air blower to gently clear any dust from the sensor surface.
- If the dust appears to be internal (between the sensor and its protective window), contact Arducam support for assistance.
7. Thông số kỹ thuật
| Tính năng | Chi tiết |
|---|---|
| Cảm biến | 1-inch IMX283 CMOS |
| Max Still Resolution | 5472x3648 (20MP) |
| Độ phân giải quay video | Lên đến 720p |
| Tốc độ khung hình tối đa | 120 khung hình/giây ở độ phân giải 720p |
| Loại ống kính | 16mm C-Mount Lens |
| Đường chéo của View (DFOV) | 60° |
| Giao diện | USB 3.0 (Type-C connector on camera) |
| Khả năng tương thích của hệ điều hành | Windows, Linux |
| Nhà ở | Vỏ kim loại |
| Trọng lượng sản phẩm | 4.8 ounce |
| Kích thước gói hàng | 3 x 2.7 x 2.7 inch |
8. Hỗ trợ và Bảo hành
For technical support, product inquiries, or warranty information, please visit the official Arducam webhoặc liên hệ trực tiếp với bộ phận chăm sóc khách hàng của họ. Các điều khoản bảo hành cụ thể có thể khác nhau tùy theo khu vực và địa điểm mua hàng.
Bạn có thể tìm thêm thông tin và tài nguyên hỗ trợ trên Arducam Store on Amazon.


