1. Giới thiệu
The Cherry MW 8C Ergo is an ergonomic, right-handed wireless mouse designed for comfort and precision. It offers flexible connectivity options via Bluetooth or a 2.4 GHz wireless USB dongle, ensuring a stable and secure connection with AES-128 encryption. This rechargeable mouse features a high-precision sensor for accurate tracking and is built for durability and extended use. This manual provides detailed instructions for setting up, operating, maintaining, and troubleshooting your MW 8C Ergo mouse.
2. Nội dung gói hàng
Vui lòng kiểm tra gói hàng để biết các mục sau:
- Chuột không dây Cherry MW 8C Ergo
- Cáp sạc USB-A sang USB-C
- 2.4 GHz Wireless USB Receiver (dongle)
- Storage Pouch (fabric carry pouch)
- Hướng dẫn sử dụng (tài liệu này)
3. Tính năng sản phẩm
- Thiết kế công thái học: Shaped for comfortable right-handed use, reducing strain during long periods.
- Kết nối không dây kép: Seamlessly switch between Bluetooth and 2.4 GHz wireless modes.
- Pin sạc: Integrated battery provides long-lasting power and can be charged via USB-C.
- Cảm biến quang học độ chính xác cao: Ensures accurate and smooth cursor control.
- AES-128 Encryption: Secure wireless transmission for data protection.
- DPI có thể điều chỉnh: Customize cursor speed to suit your preferences.
- Kết cấu bền bỉ: High-quality materials for reliability and longevity.
4. Thiết lập
4.1. Sạc chuột
Before first use, it is recommended to fully charge the mouse. Connect the supplied USB-A to USB-C charging cable to the USB-C port on the front of the mouse and to a USB-A port on your computer or a USB power adapter.
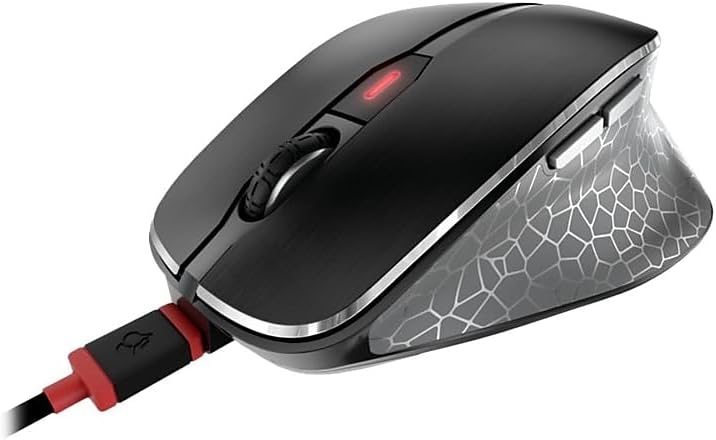
Image: The Cherry MW 8C Ergo mouse connected to its USB-C charging cable, showing the charging port and the mouse's top view.
The LED indicator on the mouse will show charging status. Once fully charged, the LED will change or turn off depending on the model's specific indicator behavior.
4.2. Kết nối không dây 2.4 GHz (Bộ thu USB)
- Locate the 2.4 GHz USB receiver (dongle), usually stored magnetically in a compartment on the bottom of the mouse.
- Cắm bộ thu USB vào cổng USB-A trống trên máy tính của bạn.
- On the bottom of the mouse, slide the 3-position switch to the "2.4 GHz" position (often indicated by a small wireless icon).
- Your computer should automatically detect and install the necessary drivers. The mouse will be ready for use.
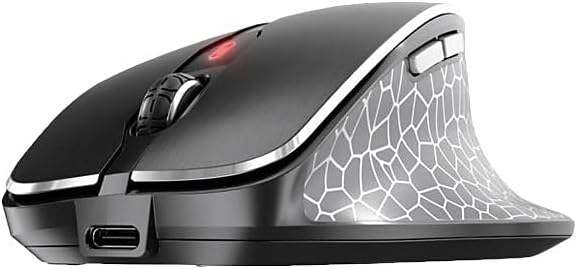
Hình ảnh: Mặt trước view of the Cherry MW 8C Ergo mouse, highlighting the USB-C charging port and the scroll wheel.
4.3. Kết nối qua Bluetooth
- On the bottom of the mouse, slide the 3-position switch to the "Bluetooth" position (often indicated by a Bluetooth icon).
- Press and hold the Bluetooth detection button on the bottom of the mouse for a few seconds until the LED indicator starts blinking, indicating pairing mode.
- Trên máy tính của bạn, hãy mở cài đặt Bluetooth:
- Cửa sổ: Vào Cài đặt > Thiết bị > Bluetooth và các thiết bị khác. Nhấp vào "Thêm Bluetooth hoặc thiết bị khác" và chọn "Bluetooth".
- hệ điều hành Mac: Vào Tùy chọn Hệ thống > Bluetooth.
- Select "Cherry MW 8C Ergo" from the list of available devices.
- Follow any on-screen prompts to complete the pairing process. The LED indicator on the mouse will stop blinking once successfully paired.
5. Vận hành chuột
5.1. Chức năng nút
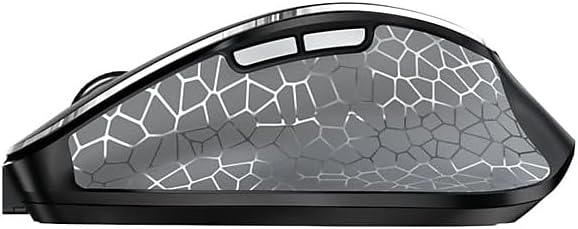
Hình ảnh: Mặt A view of the Cherry MW 8C Ergo mouse, highlighting the two programmable side buttons.
- Nút Nhấp chuột trái: Chức năng nhấp chuột chính.
- Nút nhấp chuột phải: Chức năng nhấp chuột phụ, thường dùng để mở menu ngữ cảnh.
- Bánh xe cuộn: Cuộn tài liệu lên/xuống và web trang. Cũng có thể nhấn để sử dụng chức năng nhấp chuột giữa.
- Nút DPI: Nằm phía sau con lăn chuột, nút này cho phép bạn chuyển đổi giữa các cài đặt độ nhạy DPI (Điểm ảnh trên mỗi inch) khác nhau.
- Các nút bên: Two buttons located on the thumb side of the mouse. By default, these often function as "Forward" and "Back" in web trình duyệt và file explorers. Their functions may be customizable via software (if available).
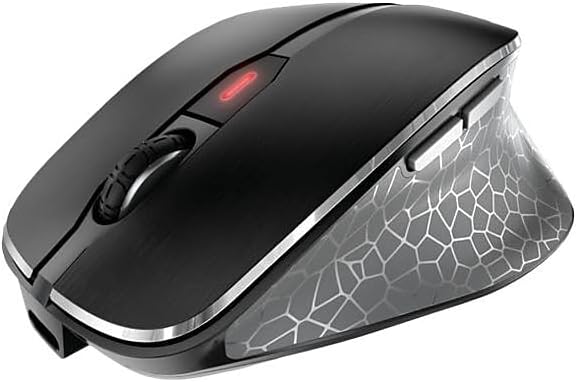
Hình ảnh: Từ trên xuống view of the Cherry MW 8C Ergo mouse, clearly showing the scroll wheel and the DPI adjustment button.
5.2. Điều chỉnh độ nhạy DPI
Press the DPI button (located behind the scroll wheel) to cycle through the available sensitivity settings. Each press will change the cursor speed, allowing you to find the optimal setting for your tasks. The mouse typically has multiple preset DPI levels.
5.3. Switching Connectivity Modes
To switch between 2.4 GHz wireless and Bluetooth modes, use the 3-position switch on the bottom of the mouse. Ensure the correct mode is selected for your desired connection type.
6. Bảo trì
6.1. Vệ sinh chuột
- Disconnect the mouse from any charging cables and turn it off using the switch on the bottom.
- Sử dụng một miếng vải mềm, không xơ vải lau nhẹampdùng nước hoặc dung dịch tẩy rửa nhẹ để lau bề mặt chuột.
- Tránh sử dụng hóa chất mạnh, chất tẩy rửa có tính mài mòn hoặc xịt trực tiếp chất lỏng lên chuột.
- Đối với cảm biến quang học, hãy dùng tăm bông khô để nhẹ nhàng lau sạch bụi bẩn.
6.2. Chăm sóc pin
- Để kéo dài tuổi thọ pin, hãy tránh xả hết pin chuột thường xuyên.
- Charge the mouse regularly, especially when the low battery indicator appears.
- If storing the mouse for an extended period, charge it to about 50% and turn it off. Recharge every few months to prevent deep discharge.
KHAI THÁC. Xử lý sự cố
7.1. Chuột không phản hồi
- Kiểm tra nguồn điện: Hãy đảm bảo chuột đã được bật và pin còn đủ dung lượng.
- Kiểm tra chế độ kết nối: Verify the switch on the bottom of the mouse is set to the correct mode (2.4 GHz or Bluetooth) for your connection type.
- Kết nối 2.4GHz:
- Hãy đảm bảo rằng bộ thu USB được cắm chắc chắn vào cổng USB đang hoạt động.
- Hãy thử cắm bộ thu vào một cổng USB khác.
- Ensure the receiver is within range of the mouse (typically up to 10 meters).
- Kết nối Bluetooth:
- Đảm bảo Bluetooth được bật trên máy tính của bạn.
- Try re-pairing the mouse with your computer (refer to Section 4.3).
- Ensure the mouse is within range of your computer's Bluetooth receiver.
- Khởi động lại: Turn the mouse off and then on again. Restart your computer if necessary.
7.2. Con trỏ di chuyển không ổn định hoặc không chính xác.
- Cảm biến sạch: Vệ sinh cảm biến quang học ở đáy chuột (tham khảo Mục 6.1).
- Bề mặt: Sử dụng chuột trên bề mặt sạch, không phản chiếu và đồng nhất. Tránh sử dụng trên kính hoặc các bề mặt có độ phản chiếu cao.
- Cài đặt DPI: Adjust the DPI sensitivity using the DPI button to see if a different setting improves performance.
7.3. Mouse Not Charging
- Kết nối cáp: Đảm bảo cáp USB-C được kết nối chắc chắn với cả chuột và nguồn điện.
- Nguồn điện: Try a different USB port on your computer or a different USB power adapter.
- Tính toàn vẹn của cáp: Inspect the charging cable for any damage. Try using a different USB-C charging cable if available.
8. Thông số kỹ thuật
| Tính năng | Chi tiết |
|---|---|
| Tên mẫu | MW 8C Ergo |
| Số hiệu mẫu sản phẩm | JW-8600US |
| Thương hiệu | quả anh đào |
| Công nghệ kết nối | Bluetooth, không dây 2.4 GHz |
| Phát hiện chuyển động | Quang học |
| Nguồn điện | Chạy bằng pin (Có thể sạc lại) |
| Khả năng tương thích của hệ điều hành | Windows 7, Windows 8, Windows 10, Windows 11 |
| Trọng lượng sản phẩm | 8 ounce (khoảng 227 gram) |
| Kích thước sản phẩm (DxRxC) | 4.72 x 3.11 x 1.75 inch (khoảng 120 x 79 x 44 mm) |
| Màu sắc | Đen |
| Mã hóa | AES-128 (for 2.4 GHz wireless) |
9. Bảo hành và Hỗ trợ
9.1. Thông tin bảo hành
Cherry products are manufactured to high-quality standards. This product is covered by a limited warranty against defects in materials and workmanship. Please refer to the official Cherry website or your purchase documentation for specific warranty terms and conditions applicable to your region. Keep your proof of purchase for warranty claims.
9.2. Hỗ trợ kỹ thuật
If you encounter any issues not covered in the troubleshooting section or require further assistance, please contact Cherry customer support. You can find contact information, FAQs, and additional resources on the official Cherry webđịa điểm:
Cherry chính thức Webđịa điểm: www.cherry.de/en/
Please have your product model number (JW-8600US) and proof of purchase ready when contacting support.


