1. Giới thiệu
The EPEVER Tracer1210AN MPPT Solar Charge Controller is designed to efficiently manage power from your solar panels to charge batteries. It features advanced Maximum Power Point Tracking (MPPT) technology, ensuring high tracking efficiency of over 99.5%. This controller supports 12V and 24V battery systems automatically and can handle a maximum PV input voltage of 100V. It is compatible with various battery types, including sealed lead-acid, gel, flooded, and lithium batteries. The built-in LCD screen displays key charging parameters, and multiple connectivity options allow for personalized settings and monitoring via remote meter, mobile app, or PC software.
2. Tính năng sản phẩm
The Tracer1210AN controller integrates several features for optimal performance and user interaction.

- Màn hình LCD: Shows real-time operating data and fault information.
- Chọn nút: Used to navigate through different display interfaces.
- Nút Nhập: Used to confirm selections or enter settings menus.
- Gắn lỗ: For secure installation of the controller.
- Cổng cảm biến nhiệt độ: Connects the Remote Temperature Sensor (RTS) for accurate battery temperature compensation.
- Đầu nối tấm pin mặt trời: Connects to the solar panel array.
- Đầu cực của pin: Kết nối với ngân hàng pin.
- Trạm trung chuyển hàng hóa: Kết nối với tải DC.
- COM Port (RS485): For communication with accessories like the MT50 remote meter, PC software, or mobile app.

3. Thiết lập và Cài đặt
Việc lắp đặt đúng cách rất quan trọng để bộ điều khiển sạc năng lượng mặt trời hoạt động an toàn và hiệu quả. Hãy thực hiện cẩn thận các bước sau.
3.1 Mở hộp và các thành phần
Before installation, ensure all components are present and undamaged. The package typically includes the Tracer1210AN controller, an MT50 remote meter, a Remote Temperature Sensor (RTS), and an RS485 PC communication cable.

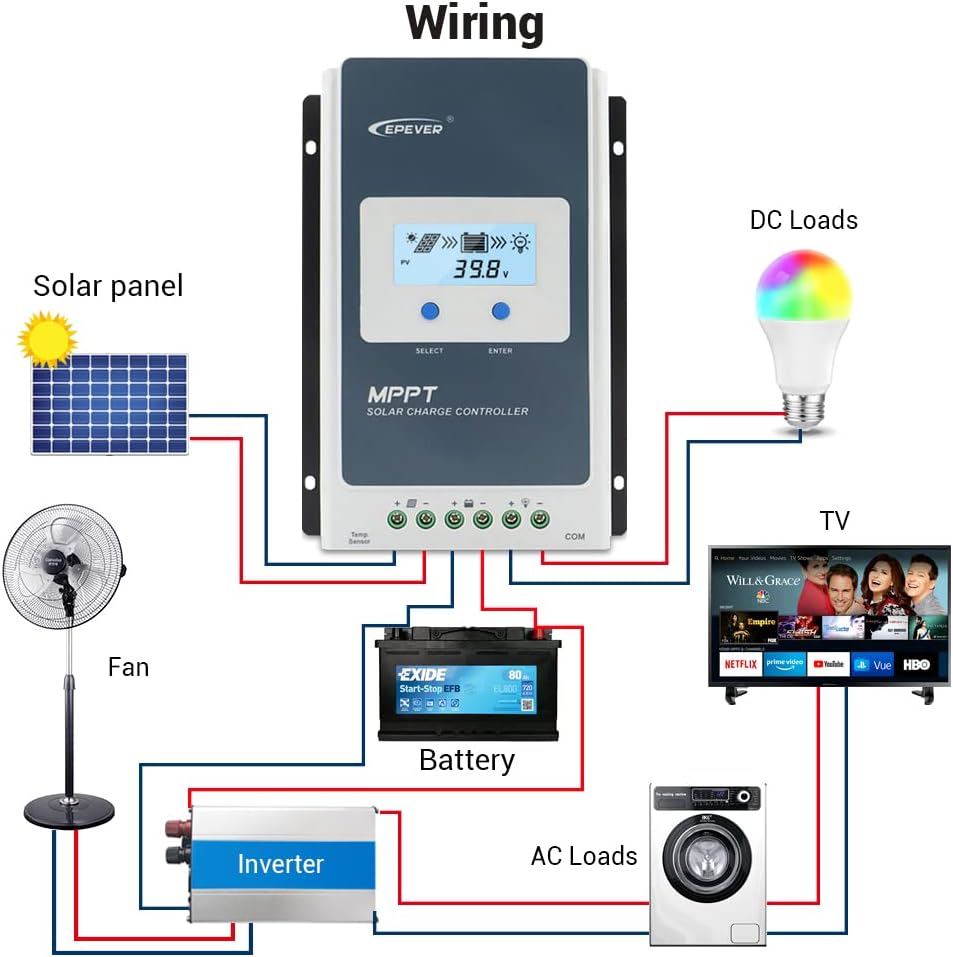
3.2 Sơ đồ đấu dây
Connect the components in the specified order to prevent damage. The connection order is: Battery → Solar Panel → Load. The disassembly order is the reverse: Load → Solar Panel → Battery.
3.3 Communication Ports and Accessories
The controller features various ports for enhanced monitoring and control.

- Cảm biến nhiệt độ từ xa (RTS): Connect the RTS300R47K3.81A to the designated port for accurate battery temperature compensation. The standard cable length is 3m.
- Cổng giao tiếp RS485: This RJ45 port allows connection to various accessories for monitoring and parameter setting.
3.4 Các bước cài đặt
- Mount the controller securely using the provided mounting holes.
- Kết nối pin với các cực pin của bộ điều khiển. Đảm bảo lắp đúng cực.
- Kết nối tấm pin mặt trời với các cực đấu nối tấm pin mặt trời của bộ điều khiển. Đảm bảo đúng cực tính.
- Connect the DC loads to the controller's load terminals. Ensure correct polarity.
- Connect the temperature sensor probe to the controller.
3.5 Video: Unboxing and Installation
Watch this video for a visual guide on unboxing and installing the EPEVER Tracer-AN controller and its accessories.
4. Hướng dẫn vận hành
This section covers basic operation and how to configure essential settings on your controller.
4.1 Manual Control Mode
The controller supports manual control of the load. Press the 'ENTER' button to toggle the load on or off.
4.2 Setting the Battery Type
It is essential to set the correct battery type for optimal charging and battery longevity. The controller supports various battery types including Sealed (default), Gel, Flooded, and different Lithium battery configurations.

Để đặt loại pin:
- Press and hold the 'ENTER' button for 5 seconds when the battery voltage interface is displayed.
- Press the 'SELECT' button when the battery type interface is flashing to cycle through available battery types.
- Press the 'ENTER' button to confirm your selection.
4.3 Setting the Load Mode
The load working mode determines how the connected DC loads operate. Options include Light ON/OFF, various timer settings, test mode, and manual mode.
To set the load mode:
- Press and hold the 'ENTER' button for 5 seconds when the load mode interface is displayed.
- Press the 'SELECT' button when the load mode interface is flashing to cycle through available modes.
- Press the 'ENTER' button to confirm your selection.
5. Thông số kỹ thuật
Below are the technical specifications for the Tracer1210AN MPPT Solar Charge Controller.
| Tham số | Giá trị (Tracer1210AN) |
|---|---|
| Hệ thống danh nghĩa Voltage | 12 / 24VDC Tự động |
| Dòng điện sạc định mức | 10A |
| Xả xếp hạng hiện tại | 10A |
| Pin Voltage Phạm vi | 8~32V |
| Tối đa PV mở mạch Voltage | 100V (ở nhiệt độ môi trường 25°C) |
| khối lượng MPPtage Phạm vi | Pin Voltage +2V ~ 72V |
| Công suất đầu vào PV tối đa | 130W/12V, 260W/24V |
| Tự tiêu thụ | ≤12mA |
| Xả mạch Voltage Thả | ≤0.23V |
| Temperature Compensate | -3mV/°C/2V (Mặc định) |
| Tiếp địa | Phủ định chung |
| Giao diện RS485 | 5VDC / 100mA |
| Thời gian đèn nền LCD | 60S (Mặc định) |
6. Phụ kiện
The EPEVER Tracer1210AN controller is often bundled with or compatible with several accessories to enhance its functionality.
- Đồng hồ đo từ xa MT50: This remote meter can display various operating data and fault information. It features easy-to-operate buttons and a clear numeric display. It is used for monitoring and setting controller parameters.
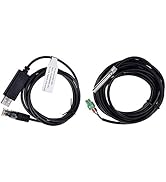
- Cảm biến nhiệt độ từ xa (RTS300R47K3.81A): Acquires battery temperature for accurate temperature compensation of control parameters. The standard length of the cable is 3m.
- Cáp USB sang RS485 (CC-USB-RS485-150U): Used to connect the controller to a PC for monitoring and setting parameters via Solar Station PC software. The cable length is 1.5m.
- Cáp OTG (OTG-12CM): Used to connect a mobile communication cable to achieve real-time monitoring and parameter modification via a mobile APP.
- Bộ chuyển đổi nối tiếp WiFi (eBox-WiFi-01): Allows monitoring and setting parameters via mobile APP software through WiFi signals.
- Bộ chuyển đổi RS485 sang Bluetooth (eBox-BLE-01): Enables monitoring and setting parameters via mobile APP software through Bluetooth signals.
- Máy ghi nhật ký (eLOG01): Records the operating status of the controller for later review.

KHAI THÁC. Xử lý sự cố
If you encounter issues with your EPEVER Tracer1210AN controller, refer to the following common troubleshooting tips:
- Không có màn hình LCD: Kiểm tra các kết nối pin và đảm bảo điện áp pin.tage nằm trong phạm vi hoạt động.
- Không sạc: Verify solar panel connections and ensure sufficient sunlight. Check for any shading on the solar panels. Confirm the battery type setting is correct.
- Tải không hoạt động: Check load connections and ensure the load mode is set correctly (e.g., Manual ON, Light ON/OFF). Verify that the battery voltage ở trên mức vol thấptagngưỡng ngắt kết nối.
- Đọc nhiệt độ không chính xác: Ensure the Remote Temperature Sensor (RTS) is properly connected and positioned near the battery.
- Các vấn đề giao tiếp: Check the RS485 cable connections to the remote meter, PC, or adapter. Ensure drivers are installed for PC communication.
For more detailed troubleshooting, consult the full product manual or contact EPEVER customer support.
8. Bảo trì
Việc bảo trì thường xuyên giúp đảm bảo tuổi thọ và hiệu suất tối ưu của bộ điều khiển sạc năng lượng mặt trời.
- Độ sạch sẽ: Giữ bộ điều khiển sạch sẽ, không bụi bẩn. Dùng khăn khô để lau chùi.
- Kết nối: Kiểm tra định kỳ tất cả các kết nối dây điện để đảm bảo độ kín và chống ăn mòn. Kết nối lỏng lẻo có thể gây quá nhiệt và hư hỏng.
- Thông gió: Ensure adequate airflow around the controller to facilitate heat dissipation. Do not block the heat sink fins.
- Tình trạng pin: Theo dõi lượng pintage and health regularly. Ensure the battery type setting on the controller matches your battery.
- Cập nhật chương trình cơ sở: Kiểm tra của nhà sản xuất webTrang web này cung cấp thông tin về các bản cập nhật phần mềm khả dụng để cải thiện hiệu năng hoặc bổ sung các tính năng mới.
9. Bảo hành và Hỗ trợ
Các sản phẩm của EPEVER được thiết kế để đảm bảo độ tin cậy và hiệu suất. Để biết thông tin bảo hành và hỗ trợ kỹ thuật, vui lòng tham khảo trang web chính thức của EPEVER. webtrang web hoặc liên hệ với nhà phân phối địa phương của bạn.
You can also visit the official iSunergy store on Amazon for product information and support: iSunergy Amazon Store.


