1. Giới thiệu
This manual provides comprehensive instructions for the assembly and safe use of your Graco & Storkcraft Crib Conversion Kit. This kit is designed to transform compatible Storkcraft and Graco 4-in-1 or 5-in-1 convertible cribs into a full-size bed, or convertible mini cribs into a twin-size bed. Please read all instructions carefully before beginning assembly and retain this manual for future reference.
2. Thông tin an toàn
- Box Spring Requirement: A box spring or bunky board is required for use with the converted bed (sold separately). Do not use the bed without proper mattress support.
- Kiểm tra tương thích: Ensure your crib model is listed as compatible in Section 4 before attempting conversion. This kit is not compatible with 3-in-1 convertible cribs that only convert to toddler beds.
- Cuộc họp: Follow all assembly steps precisely. Improper assembly can lead to instability and potential hazards.
- Phần cứng: Use only the hardware provided with this conversion kit. Do not substitute parts. Headboard/footboard mounting hardware is not included and must be purchased separately if desired.
- Giới hạn trọng lượng: The converted bed frame is designed to support a maximum weight of 250 pounds.
3. Danh sách các bộ phận
Xác minh rằng tất cả các thành phần đều có sẵn trước khi bắt đầu lắp ráp:
- Metal Bed Frame Rails (2 long, 2 short)
- Adjustable Support Legs (typically 3-6, depending on size)
- Double-Ended Brackets (4)
- Bộ dụng cụ lắp ráp (bu lông, đai ốc, vòng đệm, cờ lê)
Note: Mattress and box spring/bunky board are not included.
4. Khả năng tương thích
This conversion kit is compatible with the following Graco and Storkcraft crib and mini crib models:
- Storkcraft Cribs: Alpine, Arizona Crib and Changer, Bayview, Forrest Crib with Drawer, Hillcrest, Homestead Crib with Drawer, Horizon, Luna Crib with Drawer, Modern Pacific Convertible, Moss Crib with Drawer, Orchard Convertible, Pacific Convertible, Pacific Crib and Changer, Portofino Crib and Changer, Princess, Santa Monica, Solstice, Steveston Convertible, Steveston Crib and Changer with Drawer, Sunset.
- Graco Cribs: Asheville Crib with Drawer, Benton, Benton Crib with Drawer, Benton Crib with Changer, Fable Crib and Changer, Hadley Crib with Drawer, Hadley Crib and Changer with Drawer, Harper Convertible, Jordan, Lauren, Paris, Remi Crib and Changer, Solano, Solano Crib with Drawer, Solano Crib and Changer with Drawer, Stella, Story Crib with Drawer, Teddi Crib with Drawer, Wilfred.
- Mini Cribs: Storkcraft Petal Mini Crib, Storkcraft Rosebud Mini Crib, Graco Stella Mini Crib, Graco Teddi Mini Crib.
If your crib model is not listed, please consult the manufacturer's website or contact customer support to confirm compatibility.
5. Thiết lập và lắp ráp
Follow these steps to convert your compatible crib into a full-size or twin-size bed. It is recommended to have two adults for assembly.
- Chuẩn bị cũi: Disassemble the front and back rails of your convertible crib, retaining the headboard and footboard (if applicable) and any necessary hardware for attaching them to the conversion kit. Refer to your original crib's instruction manual for specific disassembly steps.
- Assemble the Metal Bed Frame:

The image above shows the metal bed frame components. Connect the long and short metal rails using the provided hardware. Ensure all connections are secure but do not fully tighten bolts until all parts are aligned.
- Attach Double-Ended Brackets:

The image above illustrates how the double-ended brackets attach to the crib headboard. Secure the double-ended brackets to the ends of the assembled metal bed frame. These brackets are designed to accommodate both a headboard and a footboard (for twin and full-size beds, not queen). The adjustable feet on the frame should align with the mounting holes of your crib's headboard.
- Connect Headboard and Footboard: Attach your crib's headboard to one end of the bed frame using the double-ended brackets. If converting to a full or twin bed and using a footboard, attach it to the opposite end. Ensure all connections are firm.
- Điều chỉnh chân đỡ:
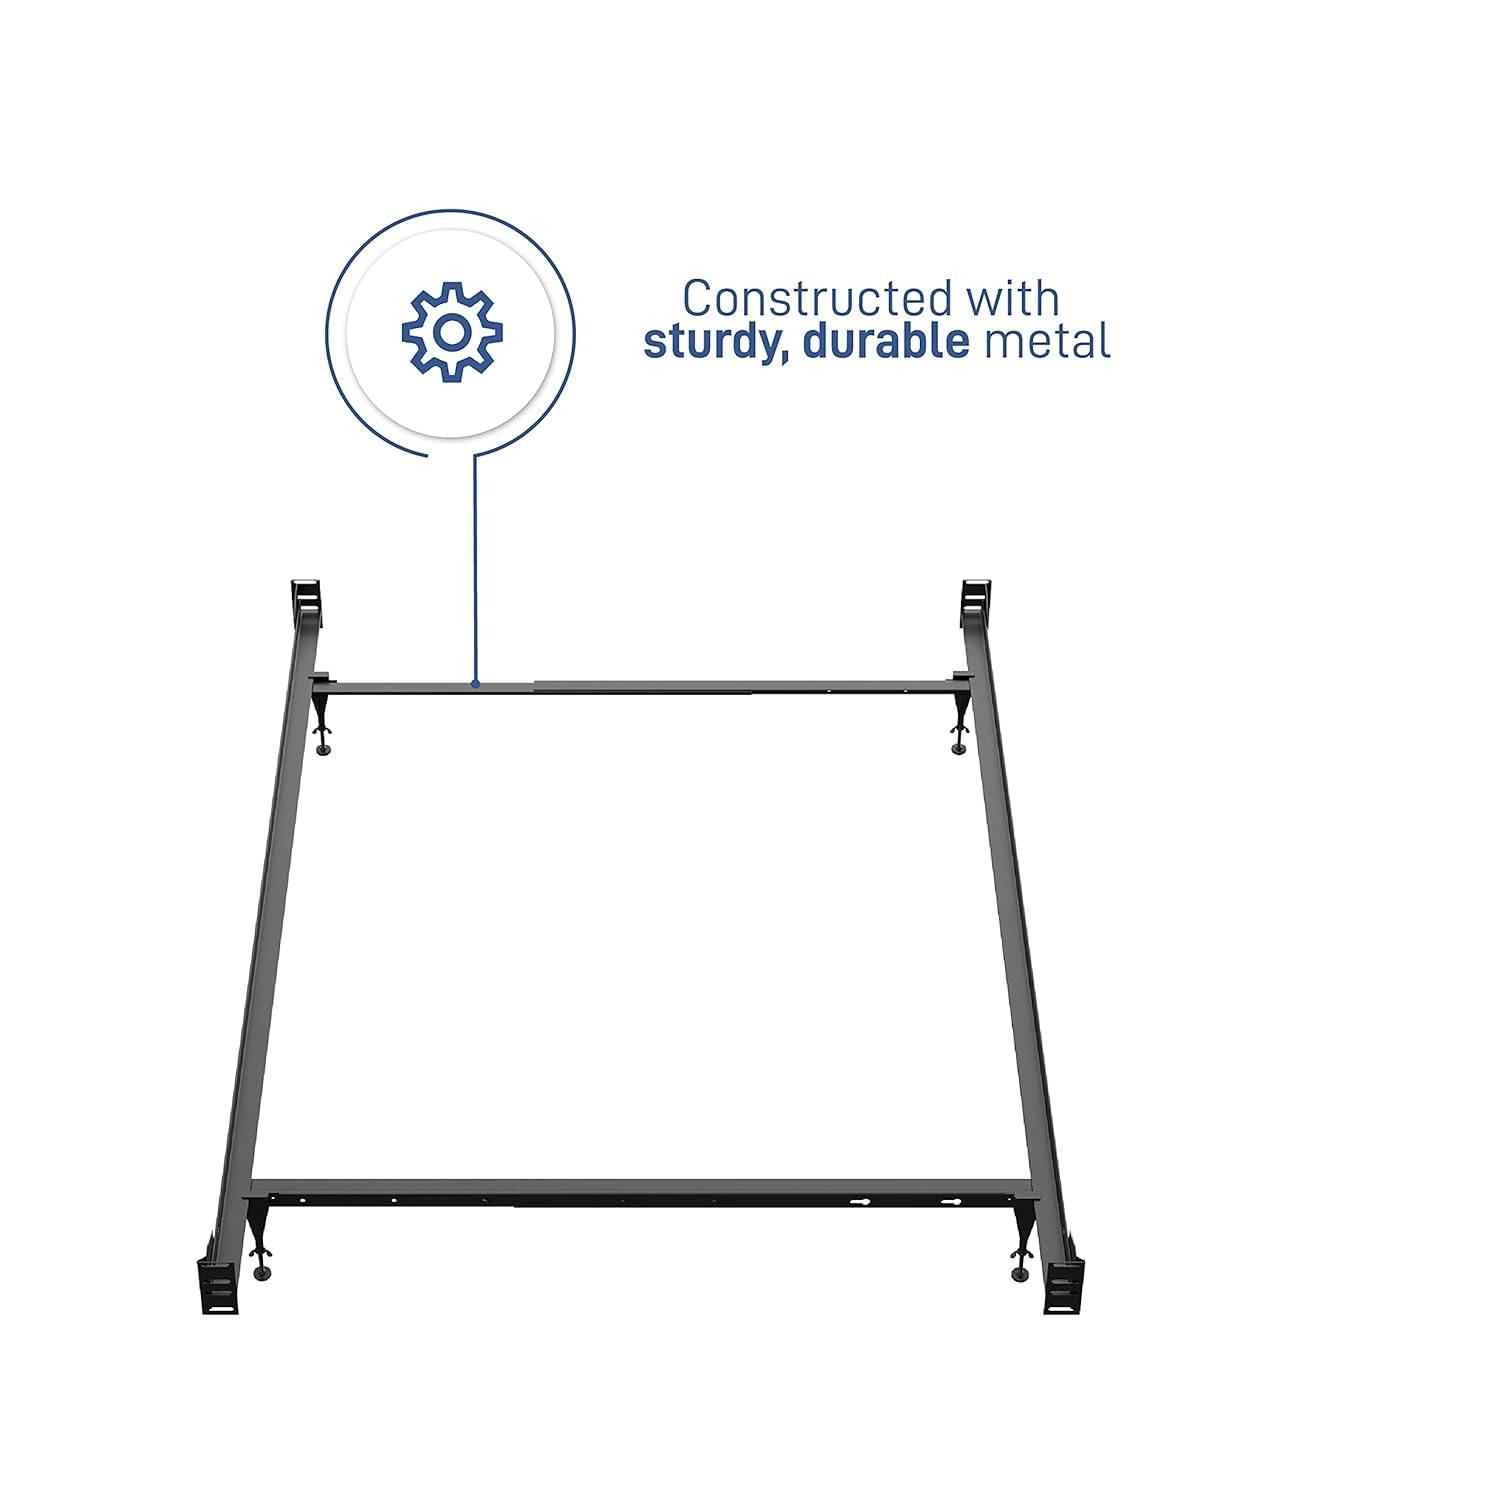
The image above displays the sturdy metal construction and adjustable support legs of the bed frame. Adjust the height of the support legs to ensure the bed frame is level and provides adequate support for your mattress and box spring.
- Thắt chặt cuối cùng: Once all components are correctly aligned and attached, fully tighten all bolts and screws. Periodically check and retighten hardware as needed.
- Add Mattress Support: Place your box spring or bunky board (not included) onto the assembled bed frame.
- Đặt nệm: Position your mattress on top of the box spring/bunky board.
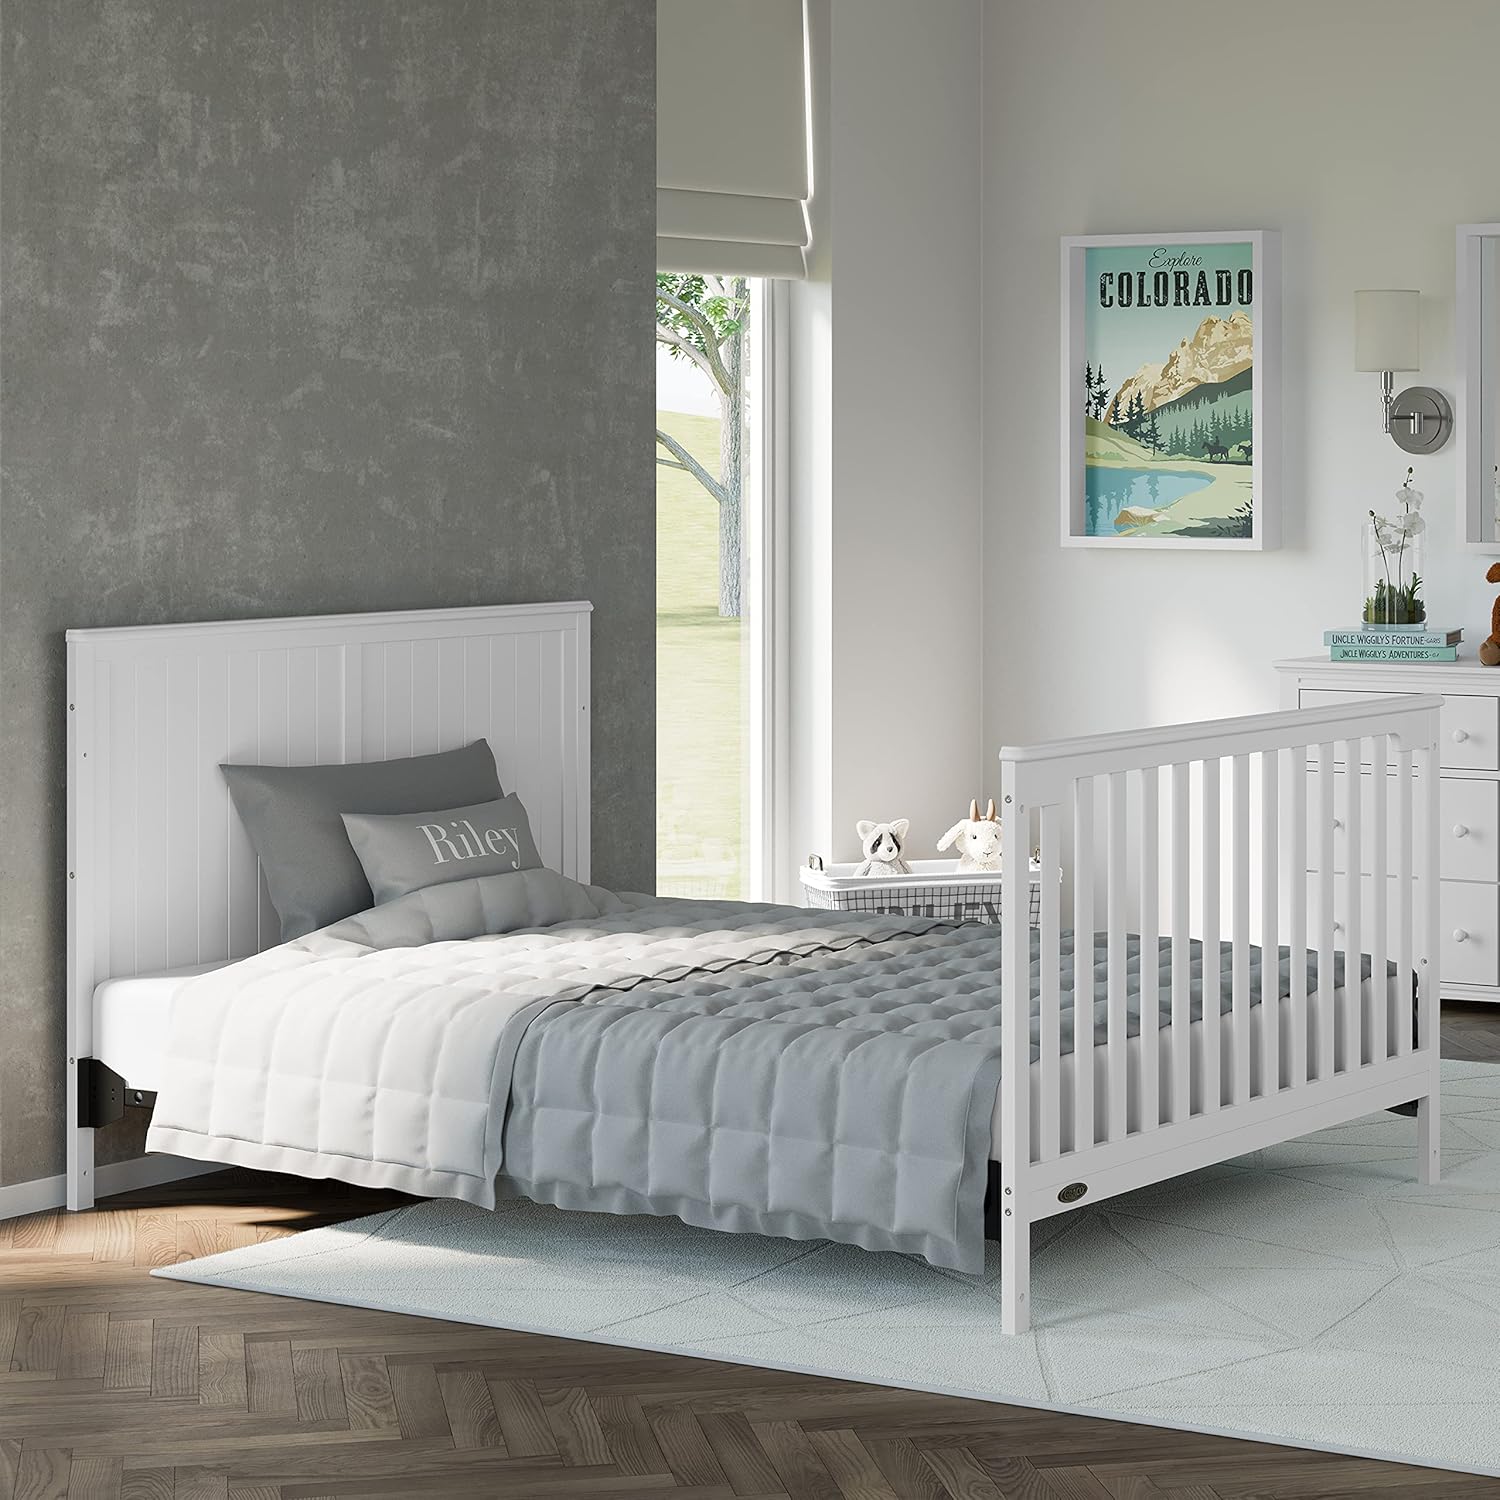
The image above shows a crib successfully converted into a full-size bed, ready for use.
6. Hướng dẫn vận hành
Once assembled, the conversion kit allows your crib to function as a standard twin, full, or queen-size bed, depending on the original crib's conversion capabilities and the size of the kit purchased. Ensure the mattress and required box spring or bunky board are correctly placed on the frame for optimal support and safety.

The image above illustrates the versatility of the conversion kit, allowing for a bed with a headboard only or with both a headboard and footboard, depending on your preference and the original crib components.
7. Bảo trì
To maintain the integrity and appearance of your bed frame:
- Vệ sinh: Lau sạch khung kim loại bằng quảng cáoamp vải. Tránh sử dụng hóa chất mạnh hoặc chất tẩy rửa có tính mài mòn vì có thể làm hỏng lớp hoàn thiện.
- Kiểm tra thường xuyên: Periodically inspect all bolts and connections to ensure they remain tight. Retighten as necessary to prevent loosening over time.
KHAI THÁC. Xử lý sự cố
- Bed Frame Instability: If the bed frame feels wobbly, ensure all bolts are fully tightened. Check that the adjustable support legs are evenly extended and making firm contact with the floor.
- Headboard/Footboard Not Fitting: Verify that your crib model is listed as compatible. Ensure the double-ended brackets are correctly oriented and attached to the bed frame. Some headboards/footboards may require specific mounting hardware not included with this kit.
- Nệm bị xẹp: Confirm that a box spring or bunky board is being used as required. Ensure the mattress size matches the converted bed frame size (twin, full, or queen).
9. Thông số kỹ thuật
| Tính năng | Chi tiết |
|---|---|
| Vật liệu | Kim loại |
| Màu sắc | Đen |
| Kích thước (D x R x C) | 75.5" x 50.5" x 12" (for full-size conversion) |
| Trọng lượng sản phẩm | 23 Bảng Anh |
| Khuyến nghị trọng lượng tối đa | 250 Bảng Anh |
| Lắp ráp bắt buộc | Đúng |
| Các thành phần bao gồm | Metal Bed Frame, Black |
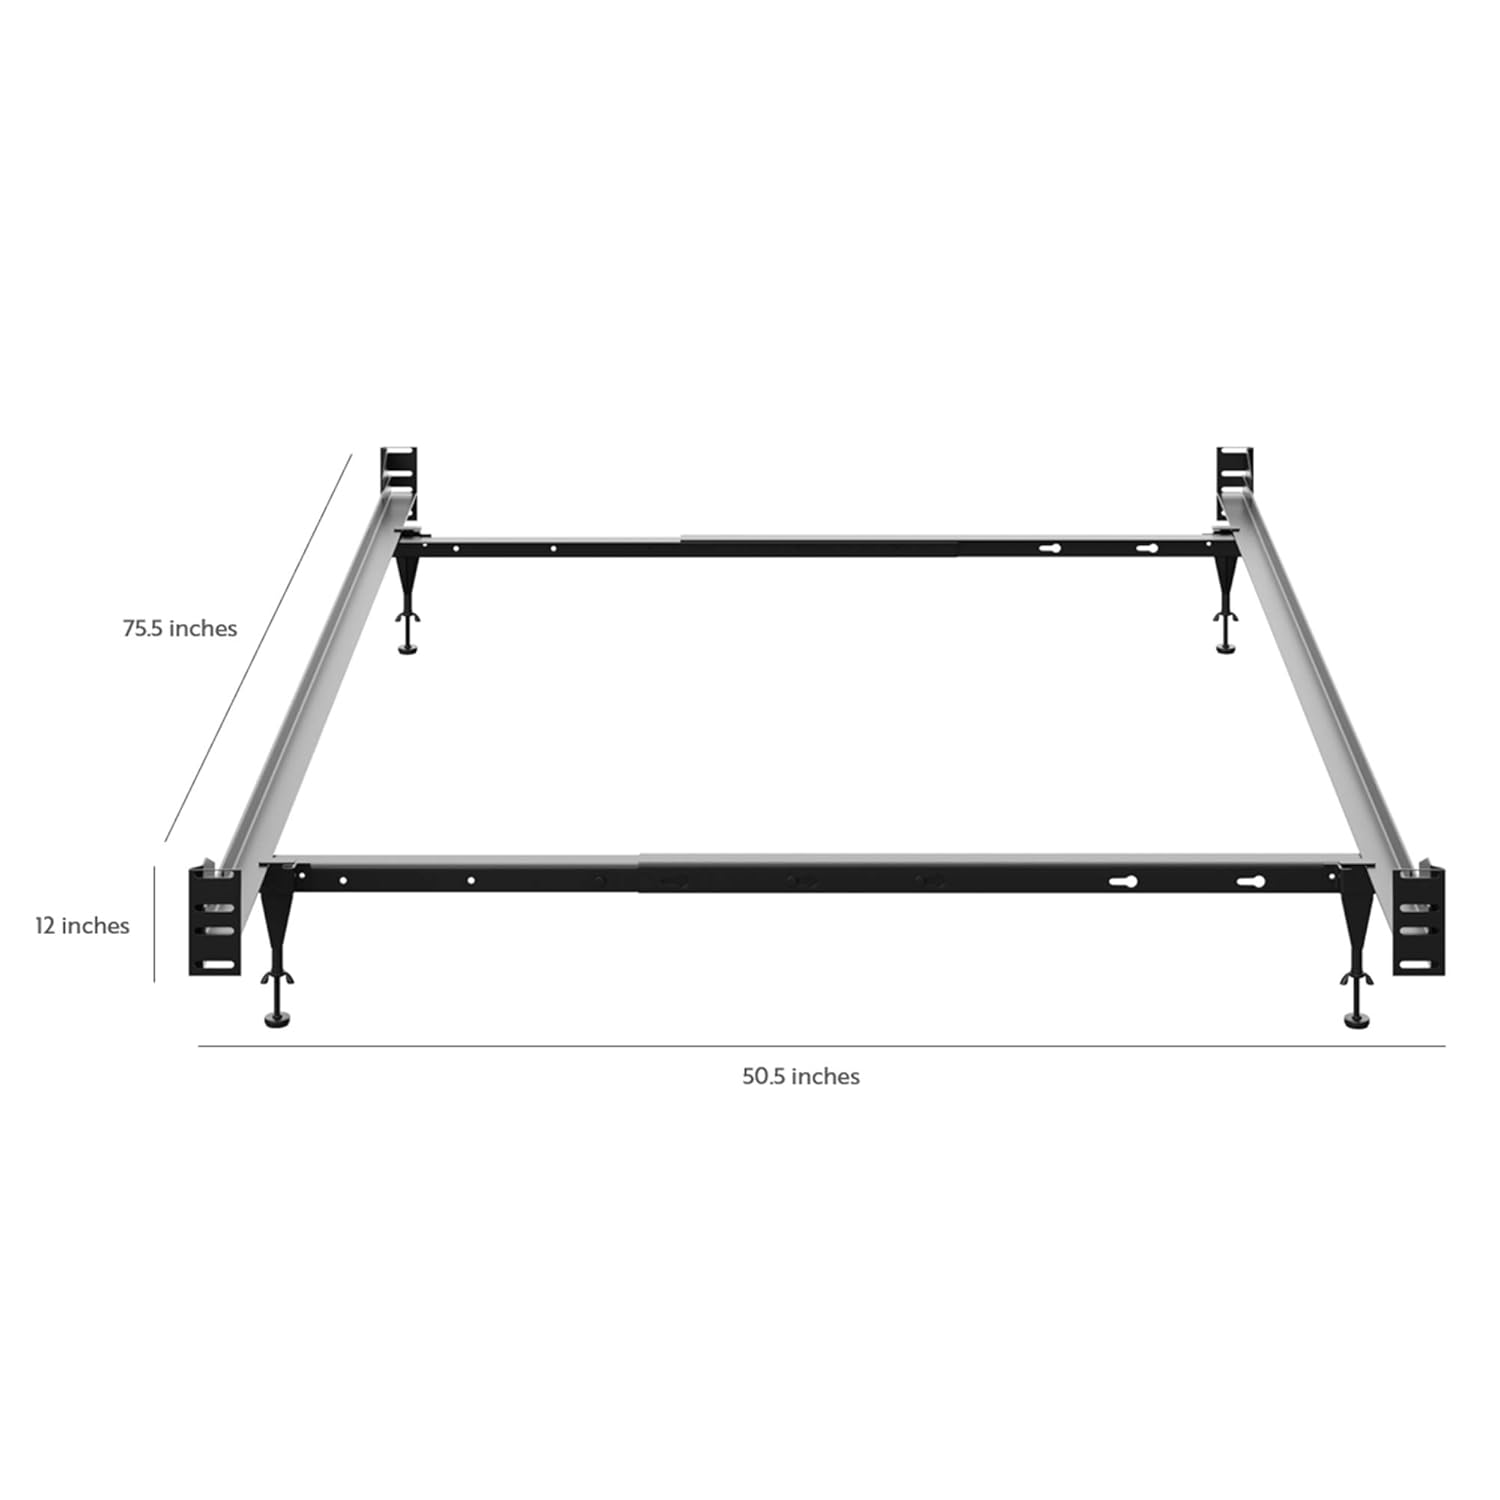
The image above provides a visual representation of the bed frame's dimensions.
10. Bảo hành
This Graco & Storkcraft Crib Conversion Kit is backed by a 1-year limited manufacturer's warranty. Please retain your proof of purchase for warranty claims. The warranty covers manufacturing defects under normal use. It does not cover damage due to misuse, improper assembly, or normal wear and tear.
11. Hỗ trợ
For further assistance, missing parts, or warranty inquiries, please contact Graco customer service. Refer to the contact information provided on the product packaging or the official Graco webđịa điểm.


