
Giới thiệu
This manual provides detailed instructions for the setup, operation, and maintenance of your diymore ESP32 Display Development Board. This board integrates an ESP32 module with a 2.8-inch LCD touch display, offering WiFi, Bluetooth, and extensive IoT connectivity for various development projects.
Sản phẩm trênview
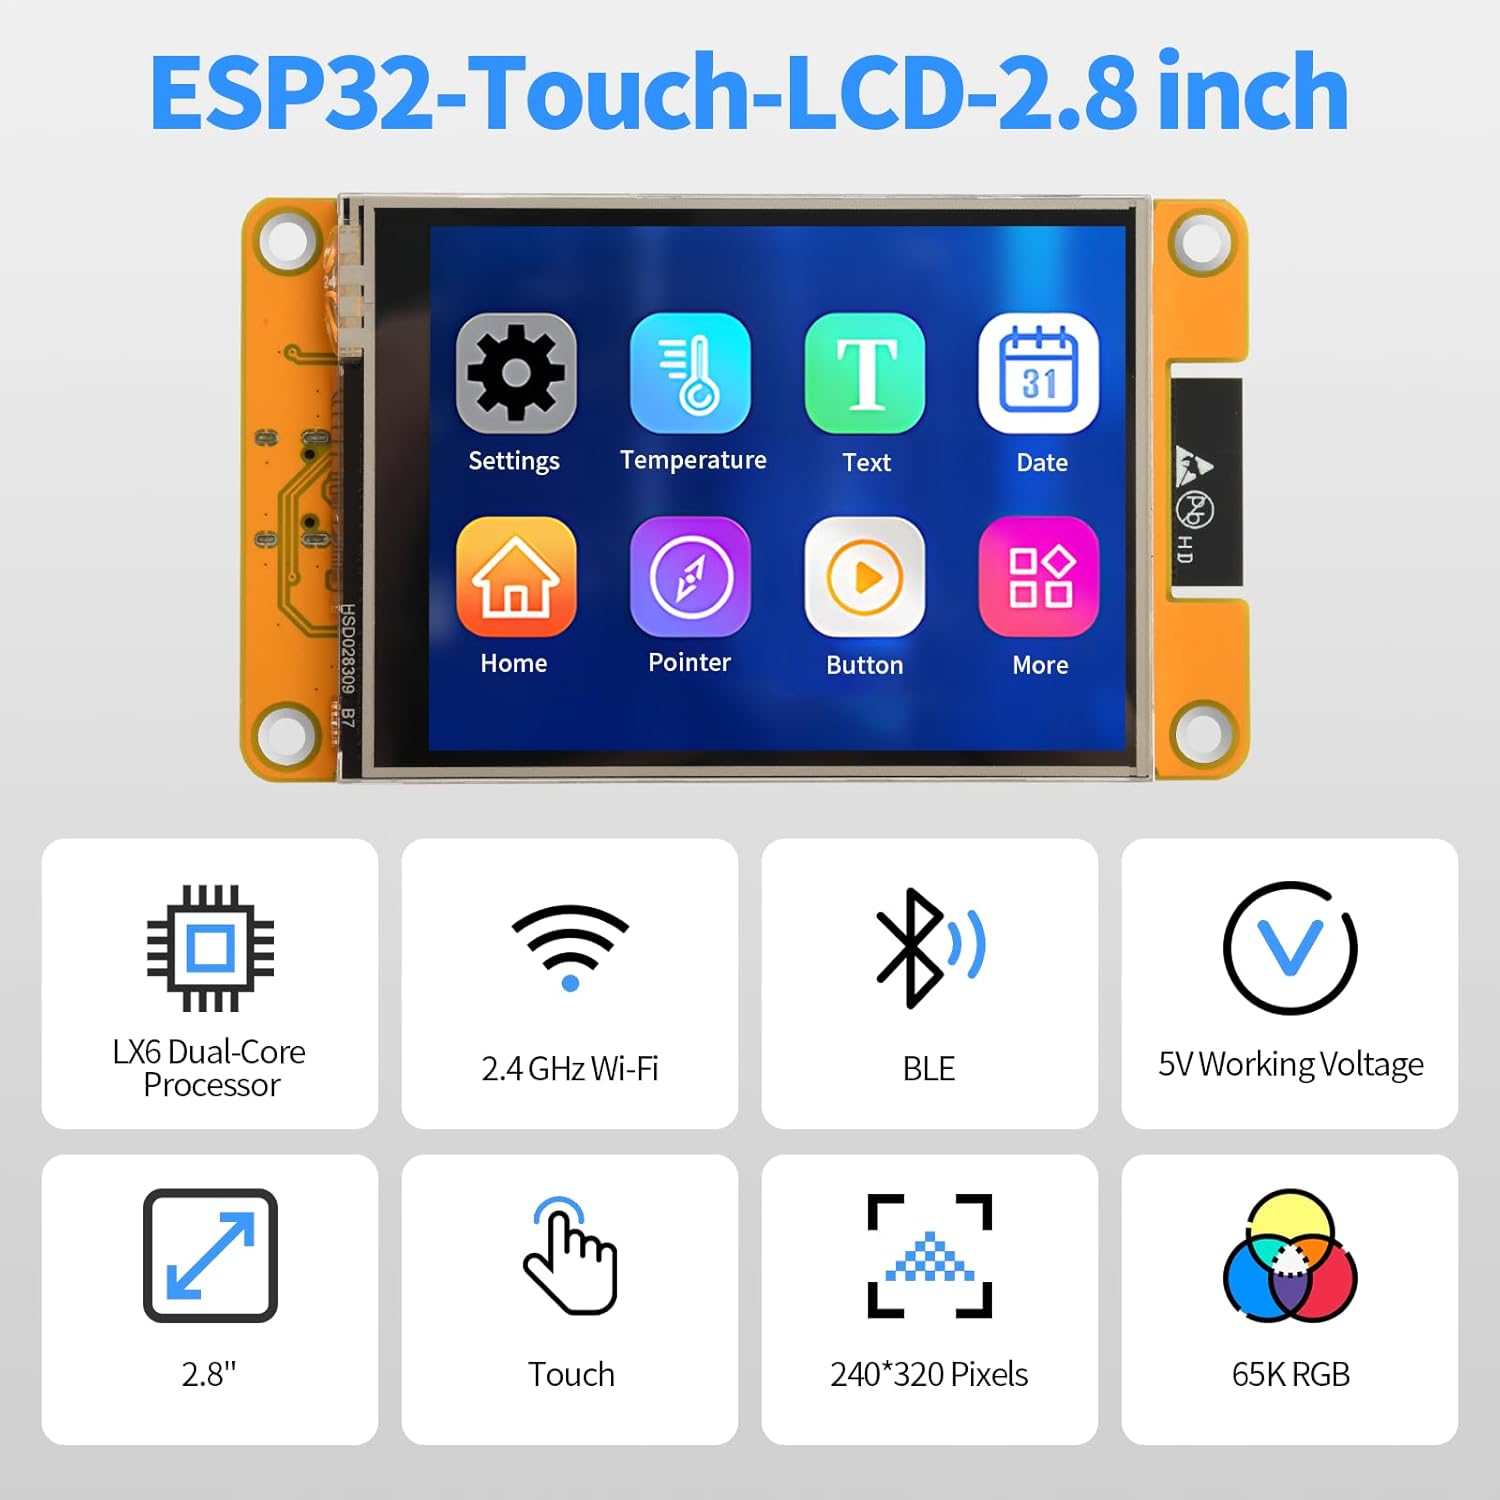
The diymore ESP32 Display Development Board is a versatile module designed for embedded systems and IoT applications. It features a 2.8-inch color LCD with a resolution of 240x320 pixels and touch functionality. The board includes a TYPE-C connector for easy programming and power supply, a Micro-TF card slot for memory expansion, and support for external speakers and lithium batteries.
Các tính năng chính:
- Integrated ESP32 module with WiFi and Bluetooth (BLE) connectivity.
- 2.8-inch 240x320 pixel color LCD touch display.
- TYPE-C USB port for power and data transfer.
- Micro-TF card slot for expandable storage.
- Support for external speakers and audio playback.
- Three-color RGB indicator for status display.
- External lithium battery support with integrated charging management.
- Multiple interface support: UART, SPI, I2C, PWM, ADC, DAC.
- Built-in flash memory, LwIP, and FreeRTOS.
- Compatibility with various development environments: Arduino IDE, MicroPython, Scratch 3.0, Espressif IDF, PlatformIO.
- Supports LVGL GUI and Human-Machine Interface (HMI) development.
Nhận dạng thành phần:
Refer to the diagram below for the location and function of key components on the development board.

- ESP32-WROOM-32 module: The core processing unit.
- Màn hình LCD 2.8": The primary visual output and touch input interface.
- Khe cắm thẻ nhớ Micro SD: For external memory expansion.
- LOẠI-C: USB port for power and programming.
- Nút reset: Resets the ESP32 module.
- Nút BOOT: Used for entering bootloader mode for flashing firmware.
- Lithium battery interface: Connector for an external 3.7V lithium polymer battery.
- UART serial port: Dùng cho giao tiếp nối tiếp.
- Horn interface: For connecting an external speaker.
- RGB: Three-color LED indicator.
- SPI peripheral interface: For connecting SPI devices.
- Extended pins: General purpose input/output (GPIO) pins for connecting other modules and sensors.
Thông số kỹ thuật
| Tham số | Giá trị |
|---|---|
| Hoạt động Voltage | 5.0 vôn |
| Backlight Current | 75mA |
| ESP32 Reset Current | 40mA |
| Display Only Operating Current | 130mA |
| Total Operating Current (Display, Speaker, Battery Charge) | 480mA |
| Power Consumption (Display Only) | 0.65W |
| Lithium Battery Charging Voltage Phạm vi | 4.2 - 6.5V |
| Lithium Battery Charging Current (Module Effective) | 290 mA (Max: 500 mA) |
| Recommended External Battery | 3.7 V Lithium Polymer Battery |
| Bộ xử lý | LX6 Dual-Core |
| Kích thước hiển thị | 2.8 inch |
| Độ phân giải màn hình | 240 x 320 pixel |
| Kết nối | 2.4 GHz Wi-Fi, Bluetooth (BLE) |
| Trọng lượng sản phẩm | 90 gam |
| Số hiệu sản phẩm của nhà sản xuất | AM03-FBBA0066-004 |

Cài đặt
- Nguồn điện: Connect the development board to a 5V power source using the provided TYPE-C USB cable. You can connect it to a computer's USB port or a compatible USB power adapter.
- Cài đặt trình điều khiển: Depending on your operating system, you may need to install USB-to-serial drivers (e.g., CP210x or CH340G drivers) for your computer to recognize the ESP32 board. Refer to the ESP32 documentation for specific driver requirements.
- Thiết lập môi trường phát triển:
- Install your preferred Integrated Development Environment (IDE), such as Arduino IDE, PlatformIO, or Espressif IDF.
- Configure the IDE to support ESP32 development boards. This typically involves installing the ESP32 board package.
- For graphical user interface (GUI) development, consider setting up LVGL.
- Initial Program Upload:
- Connect the board to your computer via the TYPE-C USB cable.
- Select the correct board and COM port in your IDE.
- Write or load your program code.
- Compile the code and upload it to the ESP32 board. Ensure the correct board and port are selected.
- If the upload fails, try holding down the BOOT button while pressing and releasing the RESET button, then release BOOT, and attempt the upload again.
- Micro-TF Card (Optional): Insert a Micro-TF card into the designated slot for additional storage if your application requires it.
- Loa ngoài (Tùy chọn): Connect an external speaker to the Horn interface if audio output is needed.
- External Battery (Optional): For portable applications, connect a 3.7V lithium polymer battery to the lithium battery interface. The board includes a charging management circuit.

Hướng dẫn sử dụng
- Hoạt động cơ bản: Once powered, the display will activate according to the loaded firmware. If no program is loaded, it may show a default boot screen or remain blank.
- Touch Screen Interaction: Use the included stylus or your finger to interact with the touch display. The responsiveness and functionality depend on the application programmed onto the ESP32.
- Programming and Firmware Upload:
- Connect the board to your computer via the TYPE-C USB port.
- Open your chosen IDE (e.g., Arduino IDE).
- Write or load your program code.
- Compile the code and upload it to the ESP32 board. Ensure the correct board and port are selected.
- If the upload fails, try holding down the BOOT button while pressing and releasing the RESET button, then release BOOT, and attempt the upload again.
- IoT Applications:
- Utilize the integrated WiFi and Bluetooth for remote monitoring, control, and data exchange.
- Develop applications for remote data query, environmental monitoring, and parameter adjustment via mobile apps or web các giao diện.
- Phát lại âm thanh: If an external speaker is connected, the ESP32 can be programmed to play audio files or generate sounds.
- Chỉ báo RGB: Observe the three-color RGB LED for status indications as defined by your custom firmware.


BẢO TRÌ
- Vệ sinh: Keep the board and display clean. Use a soft, dry cloth to wipe the screen. Avoid abrasive cleaners or solvents.
- Kho: Store the development board in a dry, anti-static environment when not in use. Avoid extreme temperatures and humidity.
- Xử lý: Handle the board by its edges to avoid touching sensitive electronic components. Static electricity can damage the board.
- Cập nhật chương trình cơ sở: Regularly check for updated firmware or library versions for the ESP32 and display drivers to ensure optimal performance and access to new features.
- Chăm sóc pin (nếu có): If using an external lithium battery, follow standard battery safety guidelines. Do not overcharge or deep discharge the battery.
Xử lý sự cố
- Problem: Board not recognized by computer.
- Giải pháp: Ensure USB-to-serial drivers are correctly installed. Try a different USB cable or port. Verify the cable is a data cable, not just a charging cable.
- Problem: Firmware upload fails.
- Giải pháp:
- Check if the correct board and COM port are selected in your IDE.
- Try holding the BOOT button, then pressing and releasing RESET, then releasing BOOT before initiating the upload.
- Hãy đảm bảo không có ứng dụng nào khác đang sử dụng cổng nối tiếp.
- Hãy kiểm tra xem mã của bạn có biên dịch mà không có lỗi hay không.
- Problem: Display is blank or shows garbled output.
- Giải pháp:
- Confirm the display is properly connected to the board (if detachable).
- Check your code for correct display initialization and drawing commands.
- Hãy đảm bảo nguồn điện ổn định và đủ dùng.
- Problem: Touch screen is unresponsive or inaccurate.
- Giải pháp:
- Calibrate the touch screen if your firmware supports it.
- Ensure the touch screen drivers are correctly implemented in your code.
- Clean the display surface for any obstructions.
- Problem: WiFi or Bluetooth connectivity issues.
- Giải pháp:
- Hãy kiểm tra xem thông tin đăng nhập mạng (SSID, mật khẩu) trong mã của bạn có chính xác không.
- Ensure the antenna (if external) is properly connected.
- Check for interference from other 2.4 GHz devices.
- Update ESP32 core libraries in your IDE.
Bảo hành và Hỗ trợ
For warranty information and technical support, please refer to the official diymore webTruy cập trang web hoặc liên hệ với nhà bán lẻ của bạn. Giữ lại hóa đơn mua hàng làm bằng chứng mua hàng cho bất kỳ yêu cầu bảo hành nào.
Online resources and community forums for ESP32 development are also available for additional assistance and project ideas.