
1. Giới thiệu và kết thúcview
This manual provides essential information for the installation, operation, and maintenance of the ACE Ruckus ICX7550-24P-E2-R3 24-Port Gigabit PoE+ Switch. This high-performance 1U rack-mount managed switch offers 24 ports of 10/100/1000 Mbps PoE+ with a 1.2 kW power budget and two 40 Gigabit QSFP+ uplinks, along with a USB Type-C console. It is designed for enterprise campus, data center, and edge deployments, supporting IP phones, wireless access points, cameras, and IoT devices.
The ICX7550-24P-E2-R3 is built for high availability and scalability, featuring dual hot-swappable power supplies, redundant fans, and the ability to stack up to 12 switches. Its advanced Layer 2 and Layer 3 capabilities ensure secure, low-latency traffic for critical applications.
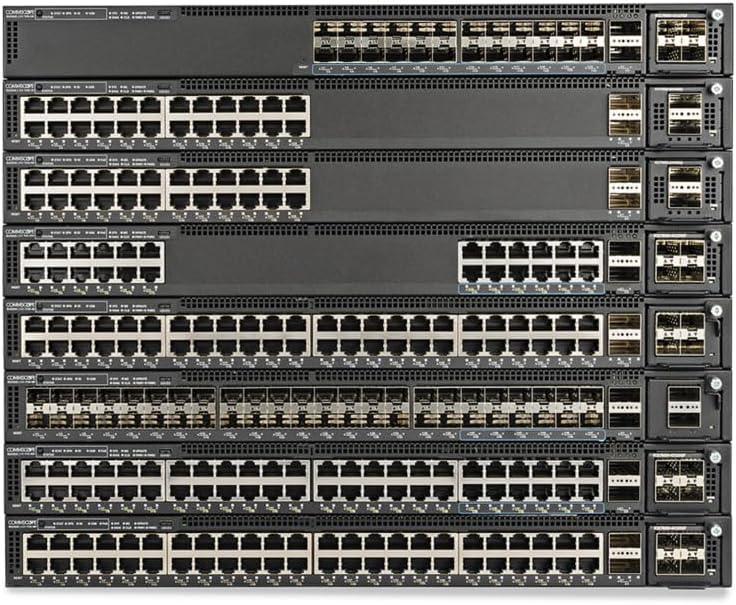
Hình 1: Mặt trước view of ACE Ruckus ICX7550-24P-E2-R3 switches, showcasing 24 Gigabit PoE+ ports and 40G QSFP+ uplinks.
2. Các tính năng chính
- 24 Gigabit PoE+ Ports: Provides 10/100/1000 Mbps connectivity with Power over Ethernet Plus, supporting a 1.2 kW power budget for connected devices.
- 40G QSFP+ Uplinks: Two integrated 40 Gigabit QSFP+ ports for high-speed backbone connections and flexible network architecture.
- USB Type-C Console: Modern console interface for local management and configuration.
- Advanced Layer 2/3 Switching: Supports static routing, Multi-Chassis Link Aggregation Group (MLAG), Quality of Service (QoS), Access Control Lists (ACLs), IGMP snooping, and multicast for robust network control.
- Thiết kế có thể xếp chồng: Allows stacking of up to 12 Ruckus switches for unified management, hitless upgrades, and scalable network expansion.
- Tính khả dụng cao: Equipped with dual hot-swappable power supplies and redundant fans to ensure continuous operation and minimize downtime.
- Ký ức: Features 4 GB RAM and 4 GB flash memory for efficient operation and storage of configurations.
- Tuân thủ TAA: Meets Trade Agreements Act requirements, suitable for government deployments.
3. Nội dung gói hàng
Verify that all items are present and undamaged upon unpacking. If any items are missing or damaged, contact your reseller immediately.
- ACE Ruckus ICX7550-24P-E2-R3 Switch Unit
- Power Cords (quantity may vary based on region)
- Bộ phụ kiện gắn tủ rack (giá đỡ, ốc vít)
- USB Type-C Console Cable
- Tài liệu (ví dụ: Hướng dẫn nhanh, Thông tin an toàn)
4. Thiết lập và Cài đặt
4.1 Cài đặt vật lý
- Giá đỡ: Securely attach the provided rack mount brackets to the switch using the included screws. Install the switch into a standard 19-inch equipment rack, ensuring adequate ventilation space around the unit.
- Những cân nhắc về môi trường: Ensure the installation environment meets the operating temperature and humidity requirements specified in the technical specifications. Avoid placing the switch near heat sources or in areas with excessive dust.
4.2 kết nối nguồn
- Connect the power cords to the dual hot-swappable power supply units at the rear of the switch.
- Plug the other end of the power cords into grounded AC power outlets. The switch will power on automatically.
4.3 Kết nối mạng
- Thiết bị Ethernet: Connect your network devices (IP phones, wireless access points, cameras, computers) to the 24 Gigabit PoE+ ports using standard Ethernet cables.
- Kết nối đường lên: Use appropriate QSFP+ transceivers and fiber optic cables to connect the two 40G QSFP+ uplink ports to your core network or other switches.
4.4 Kết nối bảng điều khiển
- Connect the USB Type-C console cable from your management workstation to the USB-C console port on the switch for initial configuration and command-line interface (CLI) access.

Hình 2: Phía sau view of ACE Ruckus ICX7550-24P-E2-R3 switches, highlighting the dual hot-swappable power supplies and fan modules.
5. Vận hành công tắc
5.1 Bật nguồn ban đầu
Once connected to power, the switch will initiate its boot sequence. Observe the system status LEDs on the front panel to confirm successful startup.
5.2 Truy cập Giao diện Quản lý
- Giao diện dòng lệnh (CLI): Access via the USB Type-C console port or remotely via SSH after initial network configuration.
- Web-Dựa vào quản lý: Access the graphical user interface (GUI) by entering the switch's IP address into a web browser. The default IP address and login credentials can be found in the Quick Start Guide or product documentation.
5.3 Cấu hình cơ bản
After accessing the management interface, perform essential configurations such as:
- Setting the management IP address and subnet mask.
- Configuring VLANs for network segmentation.
- Enabling and configuring PoE settings for connected devices.
- Setting up user accounts and access privileges.
- Configuring time and date settings (NTP).
6. Bảo trì
6.1 cập nhật chương trình cơ sở
Regularly check the ACE or Ruckus Networks support website for the latest firmware versions. Updating the firmware ensures optimal performance, security, and access to new features. Follow the provided instructions carefully during the update process.
6.2 Vệ sinh và bảo dưỡng môi trường
- Keep the switch and its surroundings clean and free of dust. Dust accumulation can impede airflow and lead to overheating.
- Use a soft, dry cloth for cleaning the exterior. Do not use liquid or aerosol cleaners.
- Ensure proper airflow by keeping ventilation openings clear.
6.3 Trạng thái hệ thống giám sát
Regularly monitor the switch's health and performance through the management interface. Pay attention to system logs, port status, CPU utilization, and temperature readings to identify potential issues early.
KHAI THÁC. Xử lý sự cố
This section provides basic troubleshooting steps for common issues. For more complex problems, refer to the comprehensive product documentation or contact technical support.
7.1 Các vấn đề về nguồn điện
- Không có điện: Verify that power cords are securely connected to both the switch and the power outlets. Check power outlet functionality.
- Power Supply Failure: If one power supply fails, the other should maintain operation. Check the status LEDs for the power supplies. Replace faulty units if necessary.
7.2 Sự cố kết nối mạng
- Port Link Down: Check the Ethernet cable connection to the device and the switch port. Verify the device is powered on and functioning.
- Không có kết nối mạng: Confirm IP address configuration, VLAN assignments, and routing settings. Check for IP address conflicts.
7.3 PoE Functionality Issues
- Thiết bị không nhận được nguồn điện: Ensure the connected device is PoE-compatible. Check PoE settings on the switch port. Verify the total PoE power budget is not exceeded.
7.4 Console Access Issues
- Cannot Connect via USB-C: Ensure the correct USB driver is installed on your management workstation. Verify terminal emulator settings (e.g., baud rate, data bits, parity, stop bits).
8. Thông số kỹ thuật
| Tính năng | Đặc điểm kỹ thuật |
|---|---|
| Số hiệu mẫu | ICX7550-24P-E2-R3 |
| Cổng | 24 x 10/100/1000 Mbps PoE+ |
| Cổng Uplink | 2 x 40G QSFP+ |
| Ngân sách điện PoE | 1.2 kW (1123.7 W max draw) |
| Cổng điều khiển | USB loại C |
| ĐẬP | 4GB |
| Bộ nhớ Flash | 4GB |
| Yếu tố hình thức | Giá đỡ 1U |
| Nguồn điện | Dual Hot-Swappable |
| Thiết bị tương thích | Wi-Fi & Ethernet Devices |
| Nhà sản xuất | RUCKUS & ACE |
| Mã số UPC | 199240108239 |
| Ngày đầu tiên có sẵn | Ngày 14 tháng 2025 năm XNUMX |
9. Bảo hành và Hỗ trợ
For technical support, warranty information, or service requests, please refer to the official ACE or Ruckus Networks website or contact your authorized reseller. Keep your purchase receipt and product serial number readily available when seeking support.