
1. Giới thiệu
Thank you for choosing the OZER Wireless Tattoo Pen Kit. This manual provides essential information for the safe and effective use of your new tattoo pen and accessories. Please read these instructions carefully before operation and retain them for future reference. This kit is designed for both beginners and experienced artists for practice and professional use.
2. Thông tin an toàn
- Sử dụng chuyên nghiệp: This device is intended for use by trained professionals or individuals practicing on synthetic skin.
- Vệ sinh: Always ensure a sterile environment. Use new, sterile needle cartridges for each session. Wear gloves and dispose of used needles properly.
- Chỉ sử dụng bên ngoài: The included inks are for external use only.
- Quyền lực: Use only the provided USB charging cable. Do not expose the device to excessive heat or moisture.
- Những đứa trẻ: Để thiết bị và tất cả phụ kiện ngoài tầm với của trẻ em.
3. Nội dung gói hàng
Your OZER Wireless Tattoo Pen Kit includes the following items:
- 1x Wireless Tattoo Pen (Black)
- 20x OZER Extreme Cartridge Needles (various types for lining, layering, shading, blending)
- 20x Mixed-color Heart-shaped Silicone Ink Cups
- 8x Tattoo Colorants (Practice Inks)
- 1x Silicone Practice Skin
- 1x Black Bandage Wrap
- 1x Đôi Găng tay
- Cáp sạc USB 1x
- 1x Hộp đựng

Hình 1: Hếtview of the OZER Tattoo Machine Kit contents.
4. Thiết lập
4.1 Sạc thiết bị
Before first use, fully charge the wireless tattoo pen. Connect the provided USB charging cable to the charging port on the pen and to a compatible USB power source. The LED display will indicate the charging status. A full charge takes approximately 1.5 hours and provides 4-6 hours of working time.
4.2 Lắp ráp bút xăm
- Gắn tay cầm: The tattoo pen consists of two main parts: the motor body with the battery and display, and the adjustable grip. Twist the grip onto the motor body until securely fastened.
- Apply Grip Tape (Optional): For enhanced comfort and grip, wrap the black bandage tape around the pen's grip area.
- Lắp hộp kim: Select a sterile needle cartridge. Push the cartridge firmly into the front opening of the pen's grip until it clicks into place. Ensure it is seated correctly.

Figure 2: Wireless Tattoo Pen components and controls.

Figure 3: Needle cartridge installation and stroke length adjustment.
4.3 Preparing Ink
Dispense a small amount of your desired practice ink into the heart-shaped silicone ink cups. These cups are designed to hold the ink securely during your tattooing session.
Video 1: Demonstrates unboxing, applying grip tape, inserting a needle cartridge, and dipping the needle into an ink cup. This video is provided by the seller, OZER-US.
5. Hướng dẫn vận hành
5.1 Bật/Tắt nguồn
To power on the device, press and hold the power button (circle icon) for 3 seconds. The LED display will illuminate, showing the current voltage and battery level. To power off, press and hold the power button for 3 seconds again.
5.2 Điều chỉnh âm lượngtage
Use the up (▲) and down (▼) arrow buttons on the pen to adjust the operating voltage. Voltage can be adjusted from 4V to 12V, displayed on the LED screen. Start with a lower voltage for practice and adjust as needed for different techniques.
5.3 Điều chỉnh độ sâu của kim
Rotate the grip of the tattoo pen clockwise or counter-clockwise to adjust the needle depth. This allows you to control how far the needle extends from the tip, which is crucial for different tattooing styles and skin types.
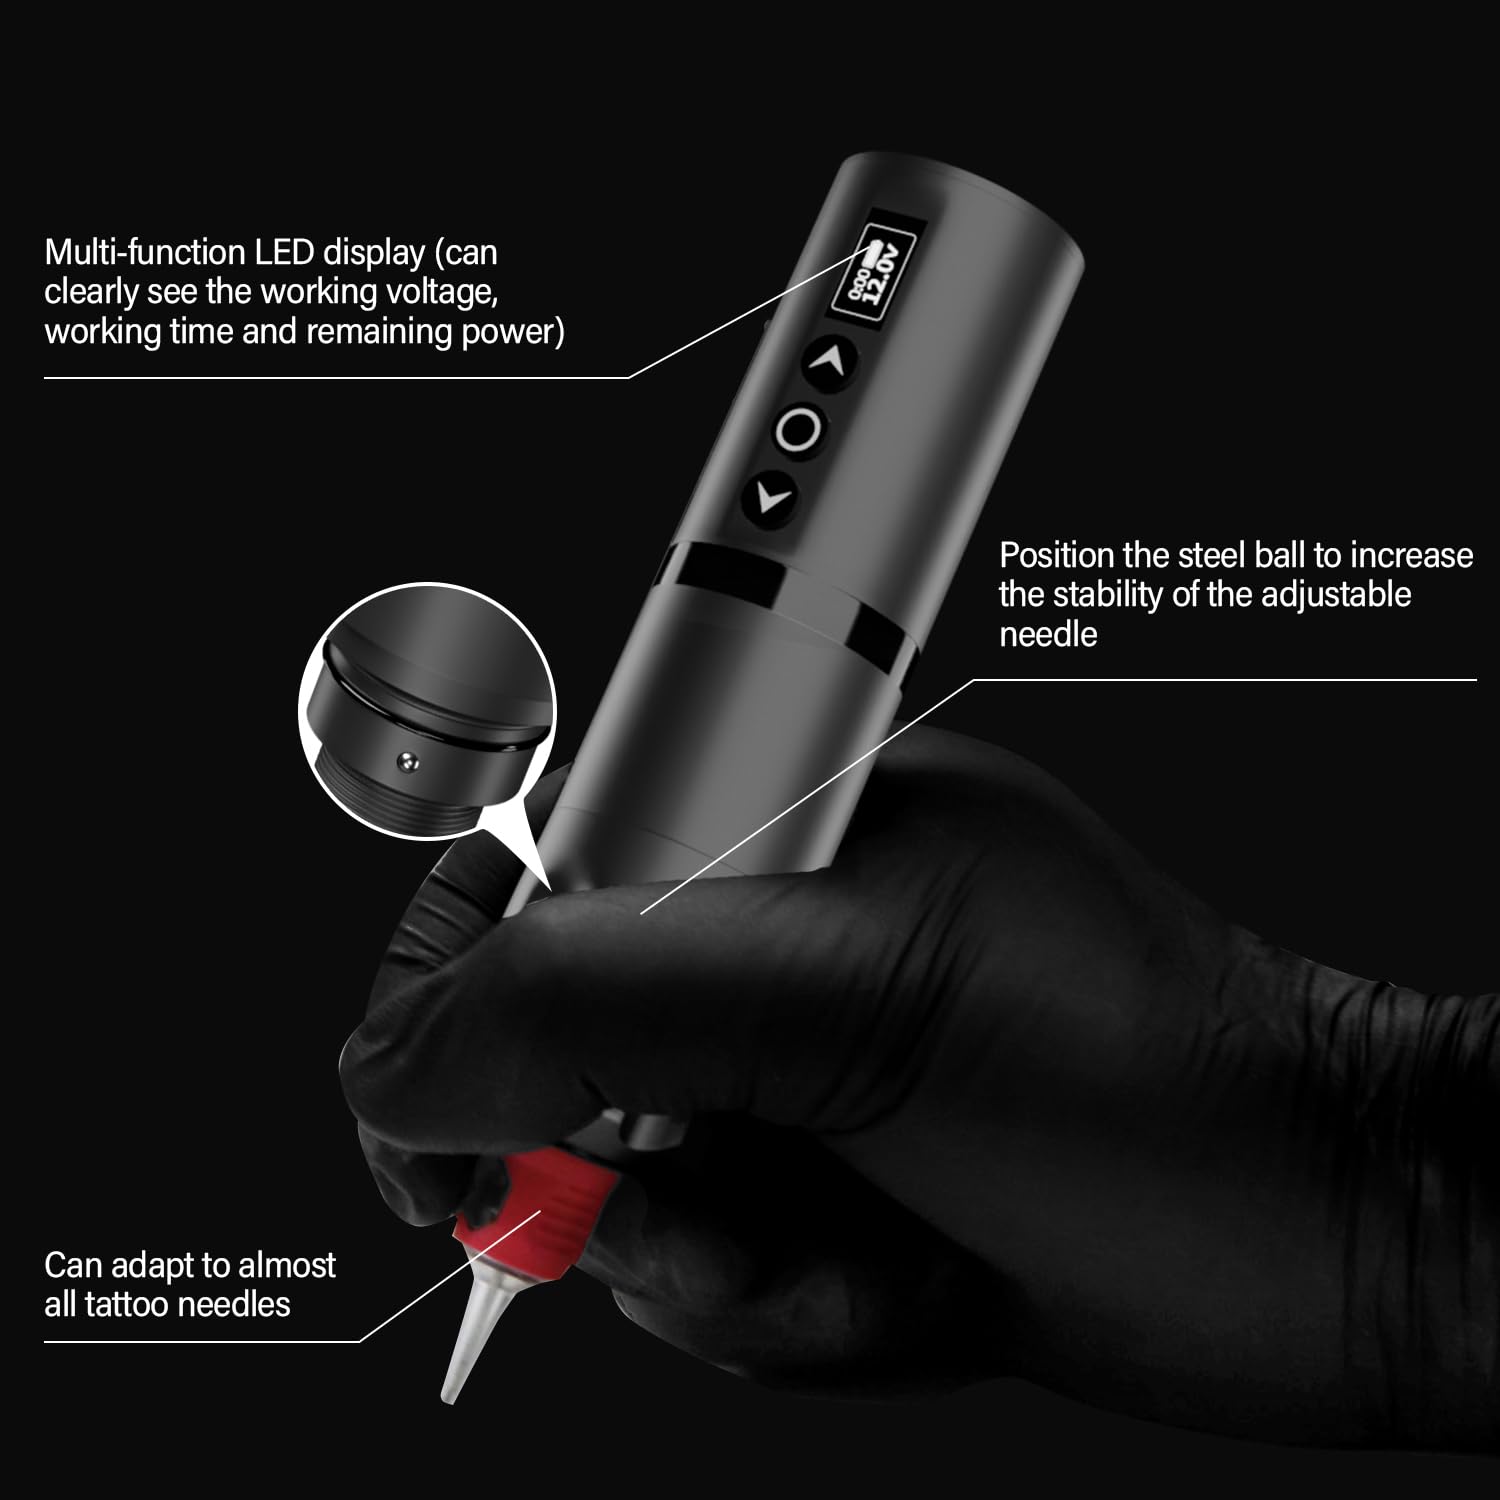
Figure 4: Multi-function LED display and controls.
5.4 Practice Tattooing
Once the pen is assembled, charged, and ink is prepared, you can begin practicing on the provided silicone practice skin. Dip the needle into the ink cup to load ink onto the cartridge. Apply gentle, consistent pressure to the practice skin to create lines and shading.

Figure 5: OZER Wireless Tattoo Pen in use.
6. Bảo trì
- Vệ sinh: After each use, disassemble the pen and thoroughly clean all reusable components with appropriate sterilization solutions. Do not immerse the motor body in liquid.
- Vứt bỏ kim tiêm: Always dispose of used needle cartridges in a designated sharps container.
- Kho: Store the tattoo pen and accessories in the provided carrying case in a cool, dry place, away from direct sunlight.
KHAI THÁC. Xử lý sự cố
- Bút không bật: Ensure the battery is fully charged. Press and hold the power button for 3 seconds.
- Kim không di chuyển: Check if the needle cartridge is correctly inserted and locked into place. Ensure the pen is powered on and the voltage is set appropriately.
- Inconsistent Ink Flow: Ensure the needle is properly dipped into the ink cup. Check for any blockages in the cartridge.
8. Thông số kỹ thuật
| Tính năng | Đặc điểm kỹ thuật |
|---|---|
| Số hiệu mẫu | 1 |
| Dung lượng pin | Ion Lithium 2000mAh |
| Thời gian sạc | Xấp xỉ 1.5 giờ |
| Thời gian làm việc | 4-6 hours (up to 8 hours reported) |
| Vol có thể điều chỉnhtage | 4V - 12V |
| Chiều dài nét vẽ | 4.0mm / 0.15in |
| Loại kim | kim mực |
| Cân nặng | 160g (khoảng 0.35 lbs) |
| Kích thước (Đường kính x Chiều cao) | 32mm (1.26in) x 122mm (4.8in) |

Figure 6: Product specifications and dimensions.
9. Bảo hành và Hỗ trợ
For warranty information or technical support, please refer to the product packaging or contact the seller directly through your purchase platform. Keep your purchase receipt as proof of purchase.