
1. Giới thiệu
This manual provides detailed instructions for the setup, operation, maintenance, and troubleshooting of your ELECROW 10.1 Inch Touchscreen Monitor. Please read this manual thoroughly before using the product to ensure proper functionality and to prevent damage.
The ELECROW 10.1 inch portable monitor features a 1280x800 IPS display, offering clear visuals and wide viewing angles. It supports touch input and is compatible with various devices and operating systems, including Raspberry Pi, Jetson Nano, Banana Pi, PC, and Windows.
2. Thiết lập
2.1 Nội dung gói
Xác minh rằng tất cả các mục được liệt kê dưới đây đều có trong gói hàng của bạn:
- 1x 10.1 inch Touch Display
- 1x HD to HD Cable
- 2x USB cable (USB A to Micro USB)
- 1x HD to Mini HD Adapter
- 1x Screw Pack (4x Small Copper Pillars, 4x M2.5 Screws)
- 2x Bracket (Pro Stand)
- 1x Tua vít
- 1x Hướng dẫn sử dụng

Image: All components included in the ELECROW 10.1 Inch Touchscreen Monitor package.

Hình ảnh: Chi tiết view of the monitor, cables, stand, and tools.
2.2 Vật lý trênview và Kết nối
Familiarize yourself with the monitor's ports and dimensions.

Image: Monitor dimensions and port layout.

Image: Close-up of the monitor's rear panel showing port functions and mounting points.
2.3 Kết nối màn hình
The monitor connects via HDMI for video signal and USB for power and touch functionality. Ensure your device has compatible ports.
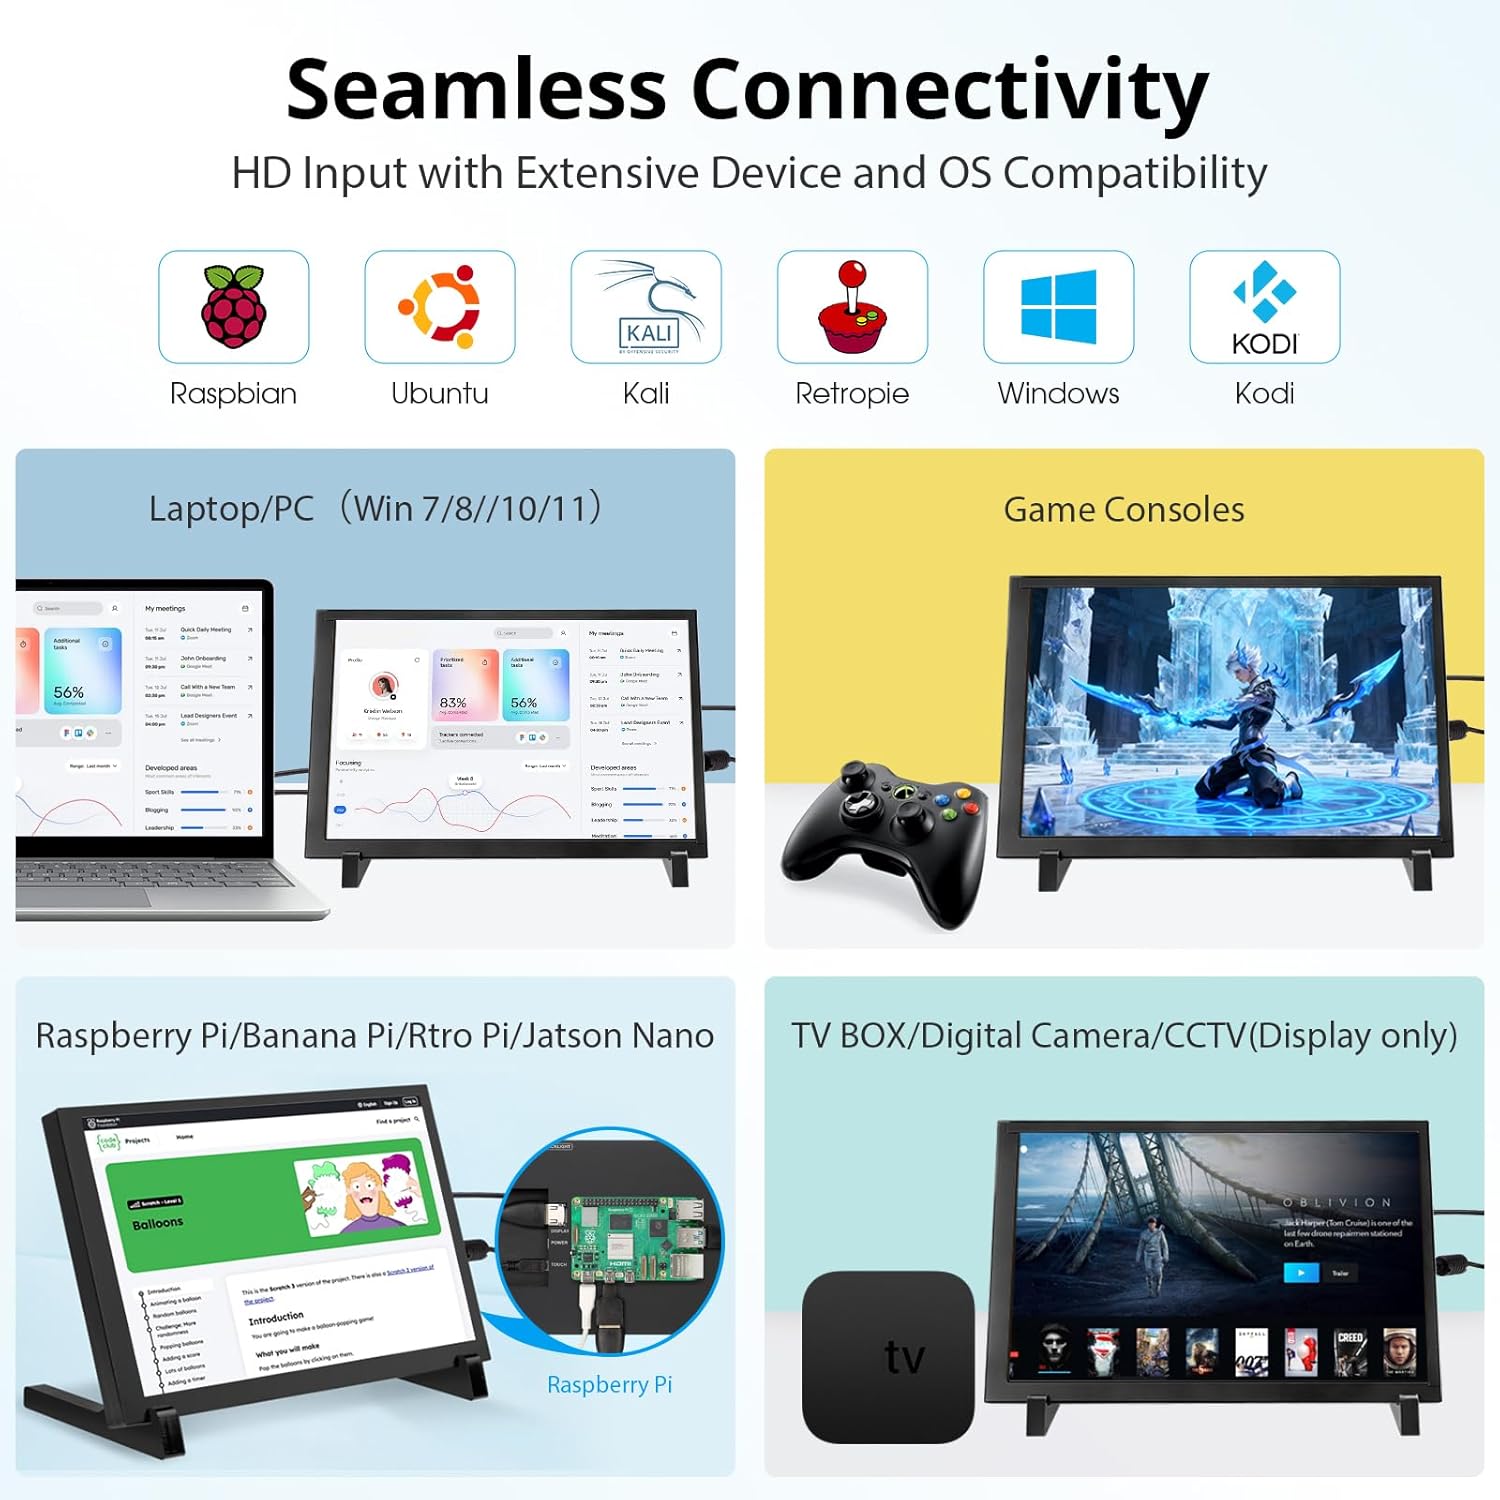
Hình ảnh: Trênview các thiết bị và hệ điều hành tương thích.
2.3.1 Kết nối với Raspberry Pi
Connect the monitor to your Raspberry Pi using the provided HDMI cable for video and a USB cable for power and touch. For Raspberry Pi 4/5, use the included HD to Mini HD adapter if necessary. The monitor supports single-point touch on Raspberry Pi OS (Raspbian), Ubuntu, and Kali Linux.

Image: Raspberry Pi connection setup.
2.3.2 Kết nối với máy tính để bàn/máy tính xách tay
Connect the monitor to your PC or laptop using an HDMI cable for video and a USB cable for power and touch. The monitor supports 5-point touch on Windows 11/10/8/7 systems.

Image: PC/Laptop connection setup.
2.3.3 Kết nối với các thiết bị khác
The monitor is compatible with Jetson Nano, Banana Pi, Beaglebone, and game consoles. Use appropriate HDMI and USB connections for these devices.

Image: Jetson Nano connection setup.
2.4 Tùy chọn gắn kết
The monitor includes a stand for desktop use and features four mounting holes on the back for integration with Raspberry Pi or wall mounting.
2.4.1 Using the Included Stand
Attach the two bracket pieces to the bottom of the monitor to form a stable stand for desktop placement.
2.4.2 Mounting Raspberry Pi Behind the Display
The monitor is designed to allow a Raspberry Pi to be mounted directly behind it, creating a compact setup. Use the provided screws and copper pillars to secure the Raspberry Pi to the designated mounting holes.

Image: Raspberry Pi mounted discreetly behind the display.

Image: Integrated Raspberry Pi and monitor setup.
2.5 Thiết lập kết thúcview Băng hình
Video: An official ELECROW overview and demonstration of the 10.1 Inch 1280x800 IPS LCD Touchscreen Monitor, showcasing its features and basic setup.
3. Hướng dẫn vận hành
3.1 Bật/Tắt nguồn
Once connected to a power source via the USB cable, the monitor will automatically power on. To power off, disconnect the USB power cable. Some operating systems may offer display power management options.
3.2 Chức năng màn hình cảm ứng
The monitor features a capacitive touchscreen. The number of touch points supported depends on the connected operating system:
- Windows (11/10/8/7): Supports 5-point multi-touch.
- Raspberry Pi OS (Raspbian), Ubuntu, Kali Linux, Win10 IoT: Supports single-point touch.

Image: 5-point multi-touch in action.

Image: Multi-touch gestures supported.
3.3 Display Quality
The 1280x800 IPS LCD panel provides a wide 178-degree viewing angle and accurate color reproduction.

Image: Display resolution comparison.

Hình ảnh: Rộng viewMinh họa góc nghiêng.
3.4 Ứng dụng đa năng
The monitor can be used for various purposes beyond its primary function with development boards, including:
- As a second monitor for PC/Laptops.
- As a digital photo frame.
- For home monitoring displays (CCTV).
- As a display for gaming consoles.

Hình ảnh: Examples of versatile display applications.

Image: Monitor used for gaming.

Image: Monitor used for home monitoring.
4. Bảo trì
4.1 Vệ sinh màn hình
Để làm sạch màn hình, hãy lau nhẹ nhàng bằng vải mềm, không xơ. Đối với các vết bẩn cứng đầu, hãy chà nhẹ bằng khăn ẩm.ampen the cloth with water or a screen-safe cleaning solution. Avoid using harsh chemicals, abrasive materials, or excessive moisture, as these can damage the screen surface.
4.2 Chăm sóc chung
- Tránh để màn hình tiếp xúc trực tiếp với ánh nắng mặt trời, nguồn nhiệt và nhiệt độ khắc nghiệt.
- Tránh làm rơi hoặc để màn hình chịu tác động mạnh.
- Do not attempt to disassemble the monitor. Unauthorized disassembly will void the warranty.
- Đảm bảo thông gió tốt khi sử dụng.
KHAI THÁC. Xử lý sự cố
5.1 Không hiển thị / Màn hình đen
- Kiểm tra nguồn điện: Ensure the monitor is receiving power via the USB cable and the power source is active.
- Check HDMI Connection: Verify that the HDMI cable is securely connected to both the monitor and the source device. Try a different HDMI cable if available.
- Ngõ ra của thiết bị nguồn: Confirm that your source device (e.g., Raspberry Pi, PC) is configured to output video to the connected HDMI port.
- Khả năng tương thích độ phân giải: Ensure the source device's output resolution is compatible with the monitor (1280x800).
5.2 Chức năng cảm ứng không hoạt động
- Check USB Touch Connection: Ensure the USB cable for touch functionality is securely connected from the monitor's 'TOUCH' port to a USB data port on your source device.
- Cài đặt trình điều khiển: For some operating systems (especially Linux distributions), specific drivers or configuration might be required for touch input. Refer to the documentation for your specific OS and device (e.g., Raspberry Pi documentation for touchscreen setup).
- Khả năng tương thích hệ điều hành: Confirm your operating system supports touch input with this monitor. Windows systems generally offer multi-touch, while Linux-based systems often require specific setup for single-touch.
5.3 Vấn đề về chất lượng hình ảnh
- Chất lượng cáp: A faulty HDMI cable can cause image distortion or flickering. Try a different cable.
- Độ phân giải nguồn: Ensure the source device is outputting at the monitor's native resolution (1280x800) for optimal clarity.
6. Thông số kỹ thuật
| Tính năng | Đặc điểm kỹ thuật |
|---|---|
| Thương hiệu | TỰ ĐỘNG |
| Tên mẫu | DIS85101D |
| Kích thước màn hình | 10.1 inch |
| Nghị quyết | 1280x800 |
| Độ phân giải gốc | 1280x800 pixel |
| Tỷ lệ khung hình | 16:10 |
| Kiểu hiển thị | Màn hình tinh thể lỏng |
| Công nghệ hiển thị | IPS |
| Mô tả bề mặt màn hình | Bóng loáng |
| Tỷ lệ tương phản | 2000:1 |
| Tốc độ làm mới | 60Hz |
| Viewgóc ing | 178 độ |
| Độ sáng | 250 cd/m² |
| Thời gian phản hồi | 8 mili giây |
| Công nghệ kết nối | HDMI, USB |
| Tổng số cổng HDMI | 1 |
| Tổng số cổng USB | 2 (Micro USB for power, Micro USB for touch/power) |
| Tiêu thụ điện năng | 5.29 watt |
| Tậptage | 5 vôn |
| Trọng lượng sản phẩm | 521 gam |
| Kích thước sản phẩm (D x R x C) | 1.6"D x 6.2"W x 9.4"H |
| Kiểu lắp đặt | Desk Mount, Wall Mount (4 mounting holes) |
| Thiết bị tương thích | Raspberry Pi 3/3B+/4B/5, Jetson Nano, Banana Pi, Beaglebone, PC (Windows, Linux, Ubuntu) |
7. Thông tin bảo hành
This ELECROW 10.1 Inch Touchscreen Monitor comes with a Bảo hành của nhà sản xuất 1 năm. Please retain your proof of purchase for warranty claims. The warranty covers defects in materials and workmanship under normal use. It does not cover damage caused by misuse, accidents, unauthorized modifications, or improper installation.
8. Hỗ trợ khách hàng
For technical assistance, troubleshooting not covered in this manual, or warranty inquiries, please contact ELECROW customer support through the retailer where you purchased the product or visit the official ELECROW webtrang web để biết thông tin liên hệ.