Giới thiệu
This manual provides comprehensive instructions for the Lexmark MS431dw Monochrome Laser Printer. It covers setup, operation, maintenance, and troubleshooting to ensure optimal performance and longevity of your device. The Lexmark MS431dw is designed for efficient monochrome printing, offering speeds up to 40 pages per minute and automatic duplex printing.

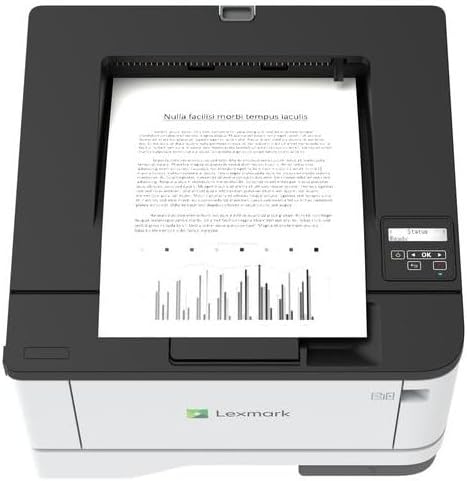
Hình ảnh: Phía trước bên phải view of the Lexmark MS431dw Monochrome Laser Printer.
Cài đặt
1. Mở gói máy in
Carefully remove the printer from its packaging. Ensure all packing materials, tapes, and protective films are removed from the exterior and interior of the printer. Retain the packaging for future transport if needed.
2. Lắp đặt hộp mực
- Mở nắp trước của máy in.
- Remove the new toner cartridge from its packaging and gently shake it to distribute the toner.
- Insert the toner cartridge into the designated slot until it clicks into place.
- Đóng nắp trước.
3. Nạp giấy
Hình ảnh: Trên cùng view of the Lexmark MS431dw with paper loaded in the input tray.
Open the paper tray and adjust the paper guides to fit the size of your paper. Load the paper stack into the tray, ensuring it is flat and below the maximum fill line. Close the paper tray. The printer supports various media types, including card stock.
4. Kết nối nguồn
Kết nối dây nguồn với đầu vào nguồn của máy in, sau đó kết nối với ổ cắm điện có nối đất.
5. Connecting to a Network/Computer
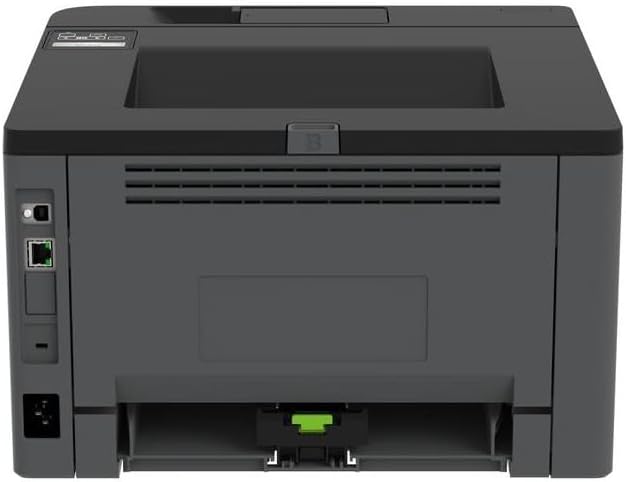
Hình ảnh: Phía sau view of the Lexmark MS431dw, highlighting the Ethernet and power connection ports.
The Lexmark MS431dw supports Ethernet connectivity. Connect an Ethernet cable from your network router or switch to the Ethernet port on the back of the printer. For direct connection to a computer, use a USB cable (not included) if available, or configure network printing.
6. Cài đặt trình điều khiển
Turn on the printer. Insert the driver CD (if provided) into your computer, or download the latest drivers from the official Lexmark support webTrang web. Làm theo hướng dẫn trên màn hình để hoàn tất cài đặt trình điều khiển.
Hướng dẫn sử dụng
1. Bảng điều khiển kết thúcview

Hình ảnh: Trên cùng view of the Lexmark MS431dw, showing the printer's control panel with display and buttons.
The control panel features a display screen and navigation buttons (Up, Down, OK, Back) to access printer settings, status, and functions. Refer to the on-screen menus for specific options.
2. In ấn cơ bản
- Hãy đảm bảo máy in đã được bật nguồn và kết nối với máy tính hoặc mạng.
- Mở tài liệu bạn muốn in trên máy tính.
- Lựa chọn In từ menu của ứng dụng (ví dụ: File > In).
- Choose the Lexmark MS431dw from the list of available printers.
- Adjust print settings as desired (e.g., number of copies, paper size).
- Nhấp chuột In.
3. Automatic Duplex Printing
The MS431dw supports automatic two-sided (duplex) printing. To enable this feature:
- In the print dialog box on your computer, navigate to the printer properties or preferences.
- Look for an option related to "Two-sided printing" or "Duplex printing."
- Select the desired duplex option (e.g., long-edge binding, short-edge binding).
- Xác nhận lựa chọn của bạn và tiến hành in.
BẢO TRÌ
1. Thay thế hộp mực
When the toner level is low, the printer's display will indicate a warning. To replace the cartridge:
- Đảm bảo máy in đã được bật nguồn.
- Mở nắp trước.
- Tháo hộp mực cũ bằng cách kéo nó ra.
- Unpack a new Lexmark-compatible toner cartridge and gently shake it.
- Lắp hộp mực mới vào cho đến khi nó khớp vào đúng vị trí.
- Đóng nắp trước.
2. Vệ sinh máy in
Việc vệ sinh thường xuyên giúp duy trì chất lượng in và kéo dài tuổi thọ máy in.
- Bên ngoài: Lau các bề mặt bên ngoài bằng giẻ mềm, dampDùng khăn không xơ vải. Không sử dụng chất tẩy rửa có tính ăn mòn hoặc dung môi.
- Nội thất: Periodically open the front cover and gently remove any dust or paper debris from accessible areas using a dry, lint-free cloth. Avoid touching the fuser unit.
Xử lý sự cố
This section addresses common issues you might encounter. For more detailed troubleshooting, refer to the Lexmark support webđịa điểm.
1. Kẹt giấy
- If a paper jam occurs, the printer display will show an error message indicating the location of the jam.
- Carefully open the indicated covers or trays.
- Nhẹ nhàng kéo tờ giấy bị kẹt theo hướng đường đi của giấy. Tránh làm rách giấy.
- Close all covers and trays. The printer should resume printing.
2. Chất lượng in kém
- Faded Prints: The toner cartridge may be low. Replace it if necessary.
- Streaks or Spots: Clean the printer's interior as described in the Maintenance section. Ensure the toner cartridge is properly seated.
- Trang trống: Verify the toner cartridge is installed correctly and has toner. Check printer drivers and print settings.
3. Các vấn đề về kết nối
- Không tìm thấy máy in: Ensure the Ethernet cable is securely connected to both the printer and the network. Verify network settings on the printer and computer.
- Trạng thái ngoại tuyến: Check the printer's power and network connection. Restart both the printer and your computer.
Thông số kỹ thuật
| Tính năng | Chi tiết |
|---|---|
| Số hiệu mẫu | 29S0110 |
| Công nghệ in ấn | Tia laze |
| Đầu ra máy in | Đơn sắc |
| Tốc độ in tối đa (Đen trắng) | Tốc độ lên đến 40 trang/phút |
| Công nghệ kết nối | Mạng Ethernet |
| Tính năng đặc biệt | Auto-Duplex (Automatic Two-sided Printing) |
| Công suất tờ đầu vào tối đa | 900 tờ |
| Hỗ trợ truyền thông in ấn | Card stock, Plain paper |
| Trọng lượng sản phẩm | 9300 gram (khoảng 20.5 lbs) |
| Cái gì?tage | 570 watt |
| Mã số UPC | 734646695558 |
Lưu ý: Thông số kỹ thuật có thể thay đổi mà không cần báo trước.
Bảo hành và Hỗ trợ
Thông tin bảo hành
Your Lexmark MS431dw printer is covered by a standard manufacturer's warranty. For specific terms, conditions, and duration of your warranty, please refer to the documentation included with your product or visit the official Lexmark webtrang web. Giữ lại bằng chứng mua hàng để yêu cầu bảo hành.
Hỗ trợ khách hàng
For technical assistance, driver downloads, or further support, please visit the official Lexmark support portal.
Visit the Lexmark Store for Support