
AUTOWIKI L: LX2592106; R: LX2593106
Đèn sương mù AUTOWIKI Lamps Hướng dẫn sử dụng
Model: L: LX2592106; R: LX2593106 | Brand: AUTOWIKI
1. Giới thiệu

Figure 1: AUTOWIKI Fog Lights Lamps (Pair).
This manual provides detailed instructions for the installation, operation, and maintenance of your new AUTOWIKI Fog Lights Lamps. Designed as a direct OEM replacement, these fog lights enhance visibility and safety during adverse weather conditions.
1.1. Khả năng tương thích
These fog lights are specifically designed for the following vehicle models:
- 2006-2010 Lexus IS250
- 2006-2010 Lexus IS350
The package includes a pair of fog lights: one for the left (driver side) and one for the right (passenger side).

Figure 2: Applicable Models - AUTOWIKI Fog Lights installed on a Lexus IS sedan, highlighting compatibility.
2. Các tính năng chính
- ✔Exact OEM Fit: Direct fitment for fog lights OEM lenses with no complex modifications.
- ✔Chất lượng tuyệt vời: Fully sealed, waterproof, dust, and corrosion resistant construction prevents moisture and dust from entering the housing, ensuring long-lasting performance.
- ✔Ánh sáng rực rỡ: Includes one pair of 9006 12V 51W light bulbs (pre-installed) for enhanced visibility in foggy conditions.
- ✔Cài đặt dễ dàng: Designed for quick and straightforward installation.
- ✔DOT/SAE Compliance: Thoroughly tested to meet federal and international standards, making the fog lamps fully street legal.
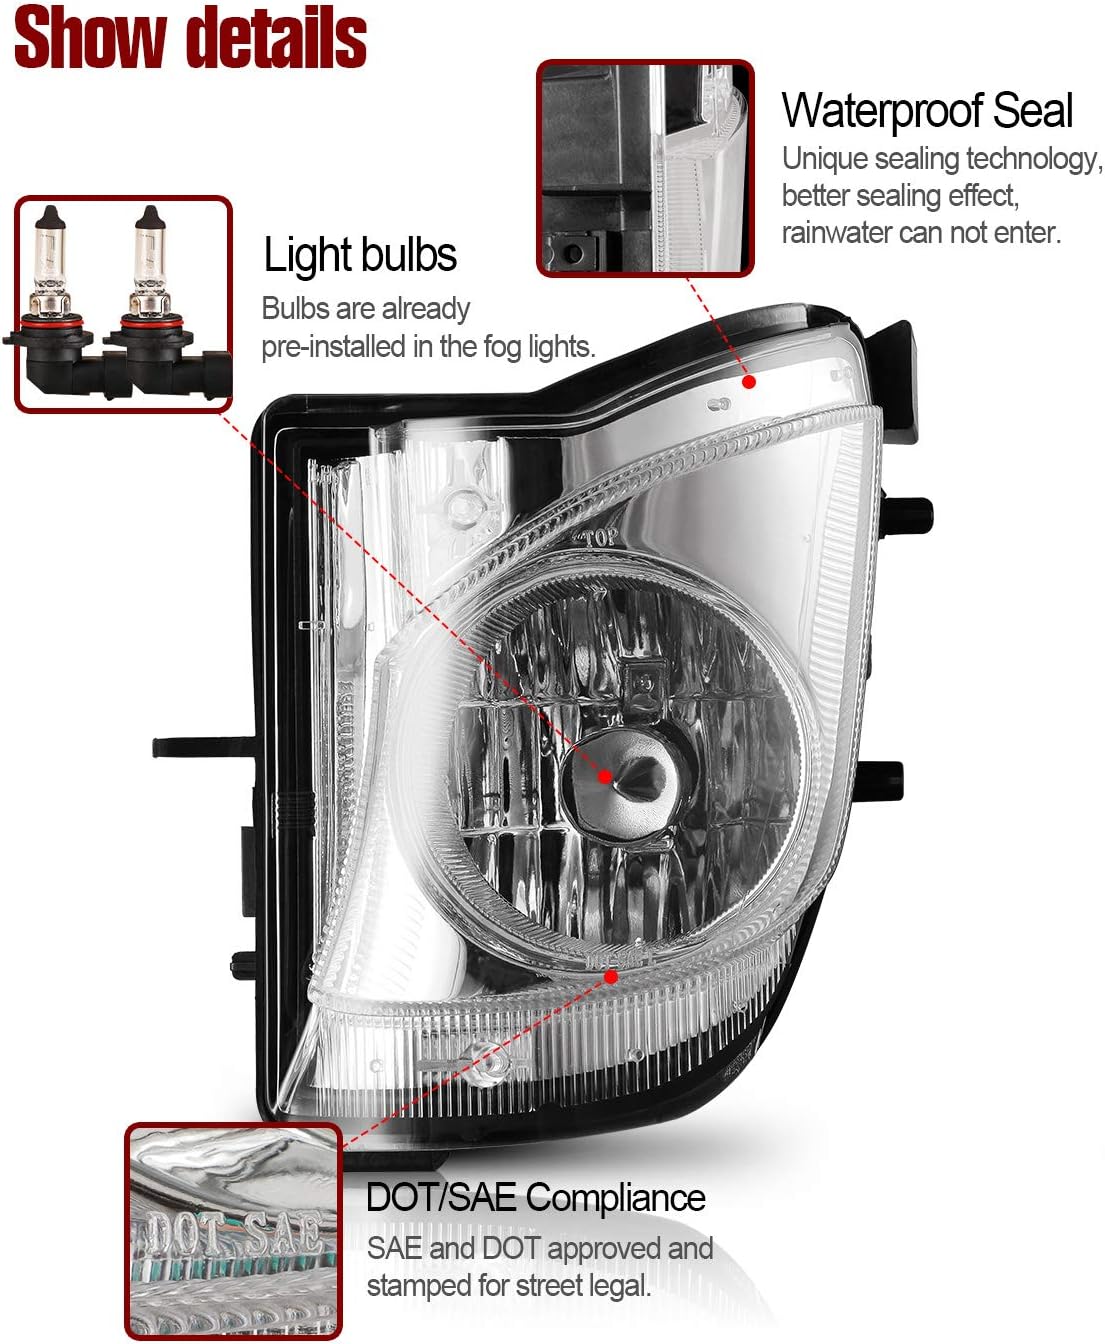
Hình 3: Chi tiết view of the fog light highlighting pre-installed bulbs, waterproof sealing, and DOT/SAE compliance.
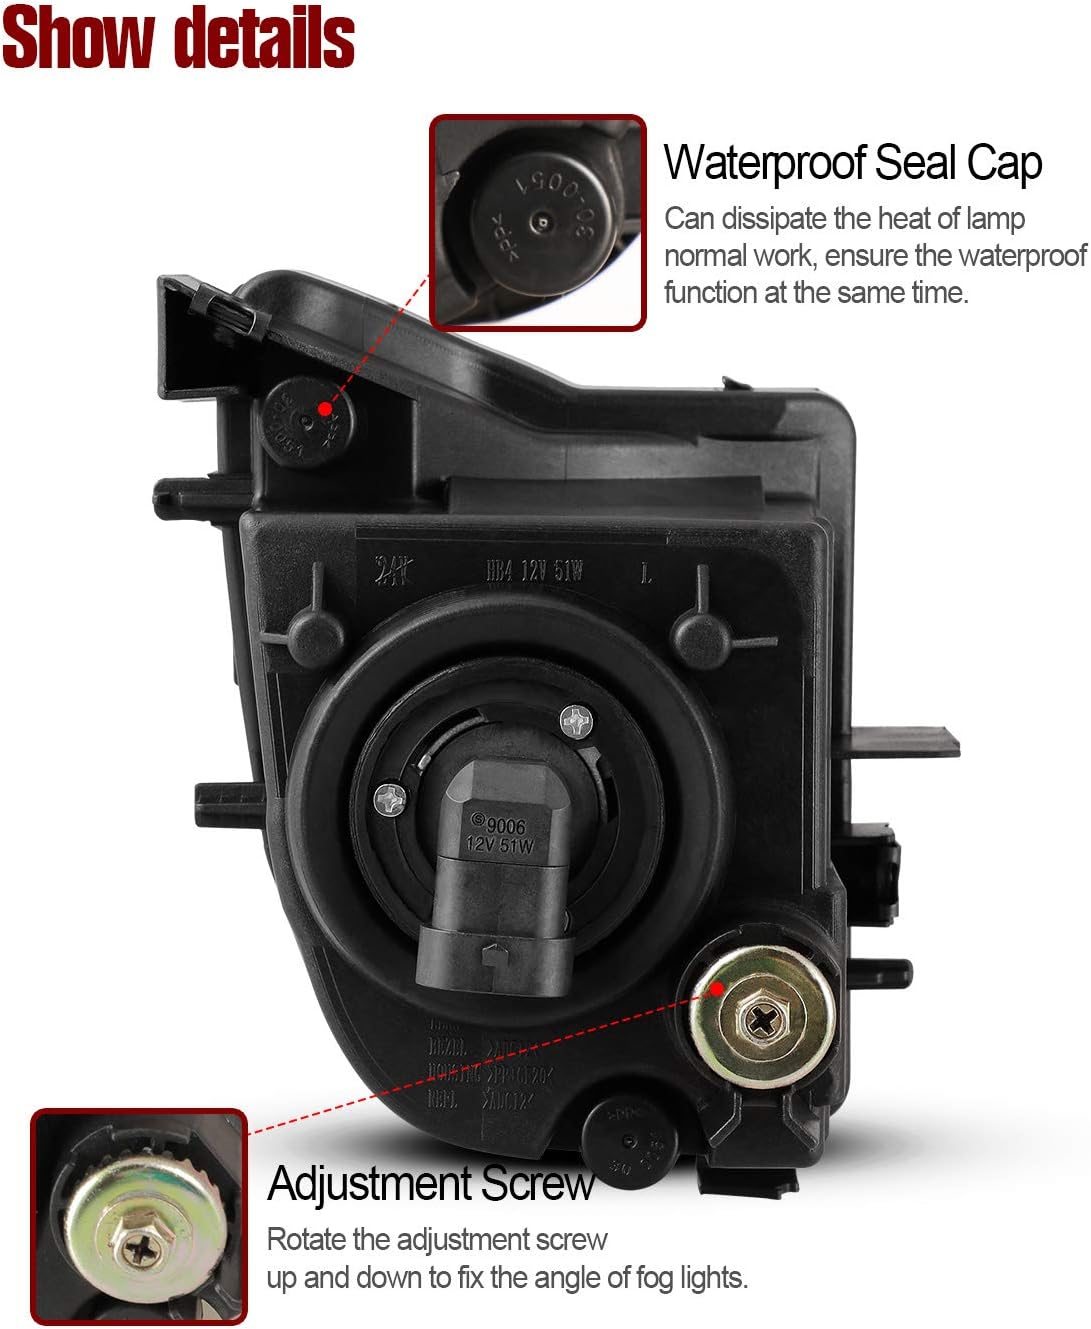
Hình 4: Phía sau view of the fog light, illustrating the waterproof seal cap and the adjustment screw for beam alignment.

Figure 5: The fog light's waterproof sealing, designed to prevent moisture and dust ingress.
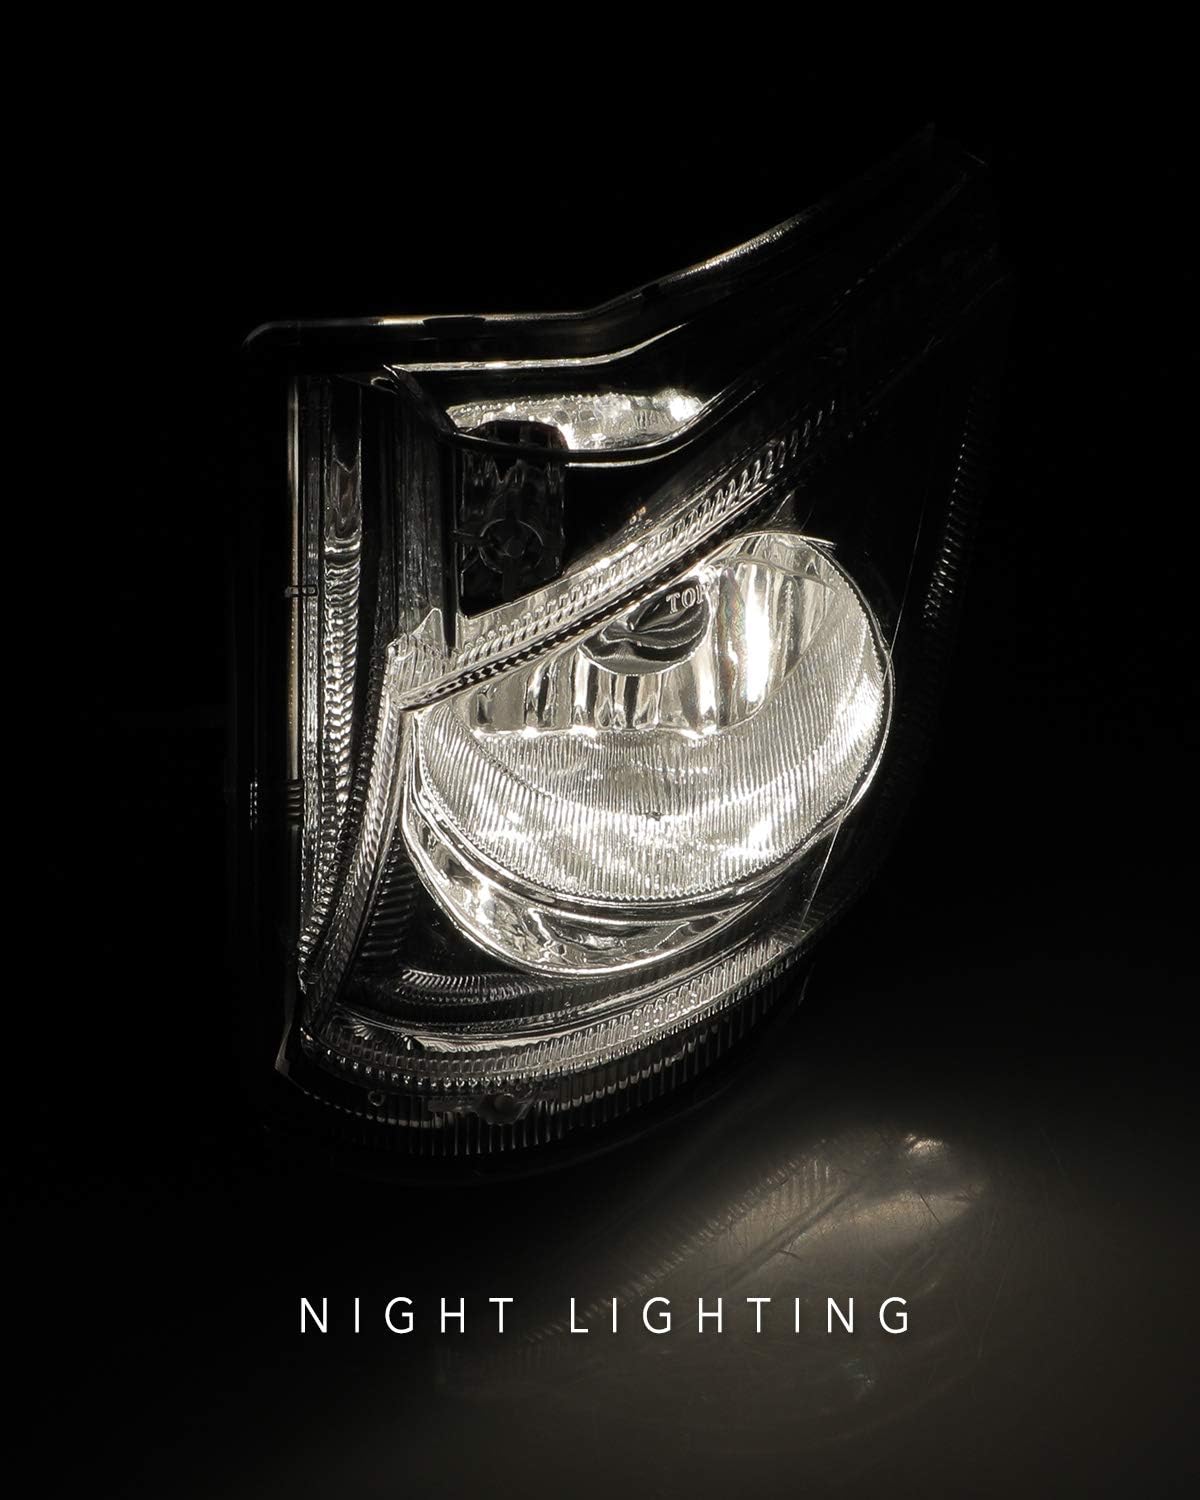
Figure 6: Night lighting performance of the AUTOWIKI Fog Light.
3. Hướng dẫn cài đặt
The AUTOWIKI Fog Lights are designed for easy installation. Please follow these steps carefully. It is recommended to have basic automotive knowledge or seek professional assistance if unsure.
3.1. Công cụ cần thiết
- Tua vít (khuyến khích dùng đầu Phillips)
- Găng tay (tùy chọn, để dễ cầm nắm)
3.2. Các bước cài đặt
- Mở gói và chuẩn bị: Carefully unpack the fog lights assembly and gather the necessary tools. Ensure the vehicle's engine is off and cool before beginning.
- Remove Existing Fog Light (if applicable): Depending on your vehicle model, you may need to access the fog light housing from the front bumper or wheel well. Remove any screws or clips securing the old fog light. Disconnect the electrical connector.
- Install New Fog Light: Position the new AUTOWIKI fog light into the designated opening. Align the mounting points.
- Vít lắp cố định: Use the provided screws (or original screws if compatible) to firmly secure the fog light in place. Tighten them with a screwdriver.
- Kết nối dây điện: Connect the fog light's electrical connector to the vehicle's wiring harness. Ensure a secure connection.
- Chức năng kiểm tra: Before reassembling any removed parts, turn on your vehicle's fog lights to ensure they illuminate correctly.
- Adjust Beam (if necessary): If the fog light beam needs adjustment, locate the adjustment screw on the back of the fog light housing (refer to Figure 4). Rotate the screw with a screwdriver to adjust the light beam vertically.
- Lắp ráp lại: Reinstall any bumper covers or other components that were removed during the installation process.
3.3. Video cài đặt
Video 1: Official AUTOWIKI Fog Lights Installation Guide for 2006-2010 Lexus IS250/IS350. This video demonstrates the unpacking, mounting, and adjustment of the fog lights.
4. Hướng dẫn vận hành
Once installed, operating your AUTOWIKI Fog Lights is straightforward and typically controlled via your vehicle's existing light switch or stalk.
- Turn On Fog Lights: Locate your vehicle's fog light switch, usually found on the headlight stalk or dashboard. Activate the switch to turn on the fog lights. A corresponding indicator light on your dashboard may illuminate.
- Turn Off Fog Lights: Deactivate the fog light switch to turn them off.
Ghi chú: Fog lights are designed for use in conditions of reduced visibility, such as fog, heavy rain, or snow. They should be turned off when visibility improves to avoid dazzling oncoming drivers.
5. Bảo trì và chăm sóc
To ensure the longevity and optimal performance of your AUTOWIKI Fog Lights, follow these maintenance guidelines:
- Vệ sinh thường xuyên: Clean the fog light lenses regularly with a soft cloth and mild automotive cleaning solution to remove dirt, dust, and road grime. Avoid abrasive cleaners that could scratch the lens.
- Kiểm tra xem có hư hỏng không: Periodically inspect the fog lights for any signs of damage, such as cracks in the lens, loose connections, or corrosion. Address any issues promptly.
- Thay thế bóng đèn: While the included bulbs are durable, they may eventually require replacement. If a bulb burns out, replace it with a compatible 9006 12V 51W bulb. Refer to your vehicle's service manual for specific bulb replacement procedures if needed.
- Kiểm tra hệ thống dây điện: Hãy đảm bảo tất cả các mối nối dây điện đều chắc chắn và không bị ăn mòn.
KHAI THÁC. Xử lý sự cố
If you encounter issues with your AUTOWIKI Fog Lights, refer to the table below for common problems and their solutions.
| Vấn đề | Nguyên nhân có thể | Giải pháp |
|---|---|---|
| Fog lights do not turn on. |
|
|
| One fog light is not working. |
|
|
| Đèn mờ hoặc nhấp nháy. |
|
|
| Hơi ẩm bên trong thấu kính. |
|
|
7. Thông số kỹ thuật sản phẩm
| Thuộc tính | Chi tiết |
|---|---|
| Thương hiệu | AUTOWIKI |
| Số hiệu mẫu | L: LX2592106; R: LX2593106 |
| Loại dịch vụ xe | 2006-2010 Lexus IS250, 2006-2010 Lexus IS350 |
| Sử dụng cụ thể cho sản phẩm | Đèn sương mù |
| Cái gì?tage | 51 watt (mỗi bóng đèn) |
| Loại bóng đèn | 9006 12V 51W (pre-installed) |
| Màu ống kính | Thông thoáng |
| Vật liệu ống kính | Nhựa |
| Tính năng đặc biệt | Không thấm nước |
| Xếp hạng an toàn | DOT Certified, SAE Compliance |
| Trọng lượng sản phẩm | 1.08 pound (tổng gói hàng) |
| Kích thước gói hàng | 12.88 x 7.84 x 7.31 inch |
| Mã số UPC | 681013044672 |

Figure 7: Product dimensions for the AUTOWIKI Fog Light.
8. Bảo hành và Hỗ trợ
AUTOWIKI products are manufactured to high-quality standards. For specific warranty information or technical support, please refer to the warranty card included with your product or visit the official AUTOWIKI webđịa điểm.
Bạn cũng có thể ghé thăm AUTOWIKI Store on Amazon để biết thêm thông tin và cách liên hệ.
Tài liệu liên quanL: LX2592106; R: LX2593106


Ask a question about this manual
Ask about setup, troubleshooting, compatibility, parts, safety, or missing instructions. Manuals+ will review the question and use this page’s manual context to help answer it.