
1. Giới thiệu
The StarTech.com SV231DPU34K is a 2-Port DisplayPort KVM Switch designed to allow control of two DisplayPort-enabled computers from a single monitor, keyboard, and mouse. This device supports high-resolution video up to 4K at 60Hz and includes an integrated USB 3.0 hub for sharing additional USB peripherals between connected systems. It also features 3.5mm analog audio switching and offers flexible control via front-panel push buttons or hotkey commands.
2. Nội dung gói hàng
- 1x KVM Switch (SV231DPU34K)
- 1x Universal Power Adapter (NA/JP, EU, UK, ANZ)
- 4x Rubber Foot Pads
3. Sản phẩm hếtview
3.1 Bảng điều khiển phía trước
The front panel provides convenient access to a USB HID port, a USB 3.0 port, and selection buttons for switching between connected computers.

Hình ảnh 1: Front Panel of the SV231DPU34K KVM Switch. Features include a USB HID port, a USB 3.0 port, and two computer selection buttons (1 and 2) with a 'SELECT' button.
3.2 Bảng điều khiển phía sau
The rear panel houses the power input, console DisplayPort and USB HID ports, and dedicated DisplayPort, USB, and audio ports for each connected PC.
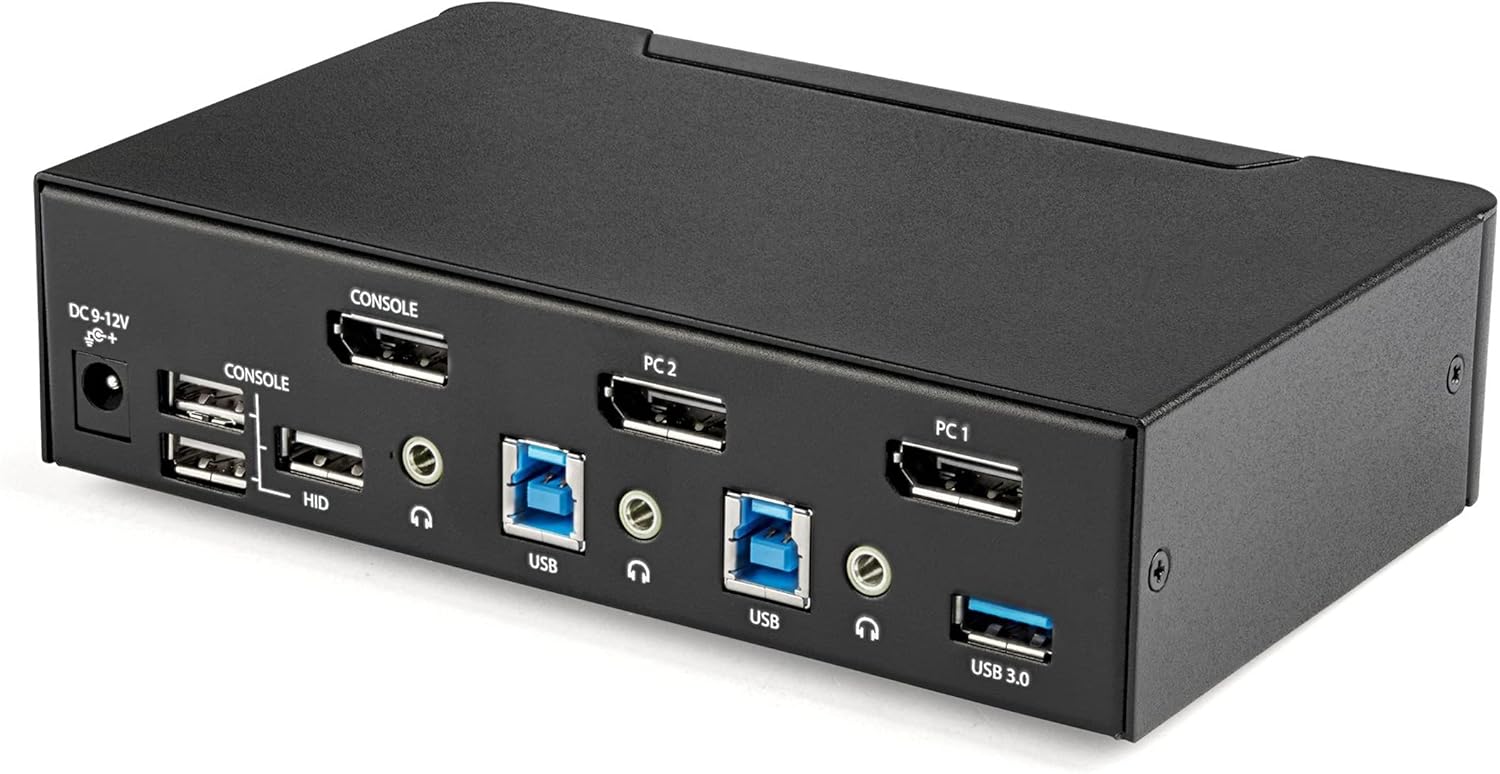
Hình ảnh 2: Rear Panel of the SV231DPU34K KVM Switch. Connections include DC 9-12V power, Console DisplayPort, Console USB HID ports, and individual DisplayPort, USB 3.0 Type-B, and 3.5mm audio jacks for PC1 and PC2.
3.3 Labeled Diagram
This diagram provides a comprehensive view of all ports and their functions on both the front and rear panels.

Hình ảnh 3: Labeled diagram illustrating all ports on the SV231DPU34K KVM Switch, including console connections for monitor, keyboard, and mouse, and PC connections for two computers.
4. Hướng dẫn thiết lập
Follow these steps to set up your StarTech.com SV231DPU34K KVM Switch:
- Tắt nguồn thiết bị: Ensure all computers, monitors, and peripherals are powered off before beginning the installation.
- Kết nối các thiết bị điều khiển:
- Connect your DisplayPort monitor to the CONSOLE DisplayPort on the rear of the KVM switch.
- Kết nối bàn phím và chuột USB của bạn với... CONSOLE HID USB Type-A ports on the rear of the KVM switch.
- If using external speakers or a microphone, connect them to the CONSOLE 3.5mm audio jacks ở phía sau.
- Connect Computers (PC1 and PC2): Đối với mỗi máy tính:
- Connect a DisplayPort cable from your computer's DisplayPort output to the corresponding PC1 DisplayPort or PC2 DisplayPort input on the KVM switch.
- Connect a USB 3.0 Type-A to Type-B cable from your computer's USB 3.0 port to the corresponding PC1 USB 3.0 Type-B or PC2 USB 3.0 Type-B input on the KVM switch.
- If using audio, connect 3.5mm audio cables from your computer's audio output/input to the corresponding PC1/PC2 3.5mm audio jacks.
- Kết nối các thiết bị ngoại vi USB: Connect any additional USB 3.0 peripherals (e.g., USB hub, printer, flash drive) to the Cổng USB 3.0 Loại A on the front or rear of the KVM switch.
- Kết nối nguồn: Connect the included universal power adapter to the Đầu vào nguồn DC 9-12V on the rear of the KVM switch, then plug it into a power outlet.
- Bật nguồn: Power on the KVM switch, then power on your monitor, and finally power on your connected computers.
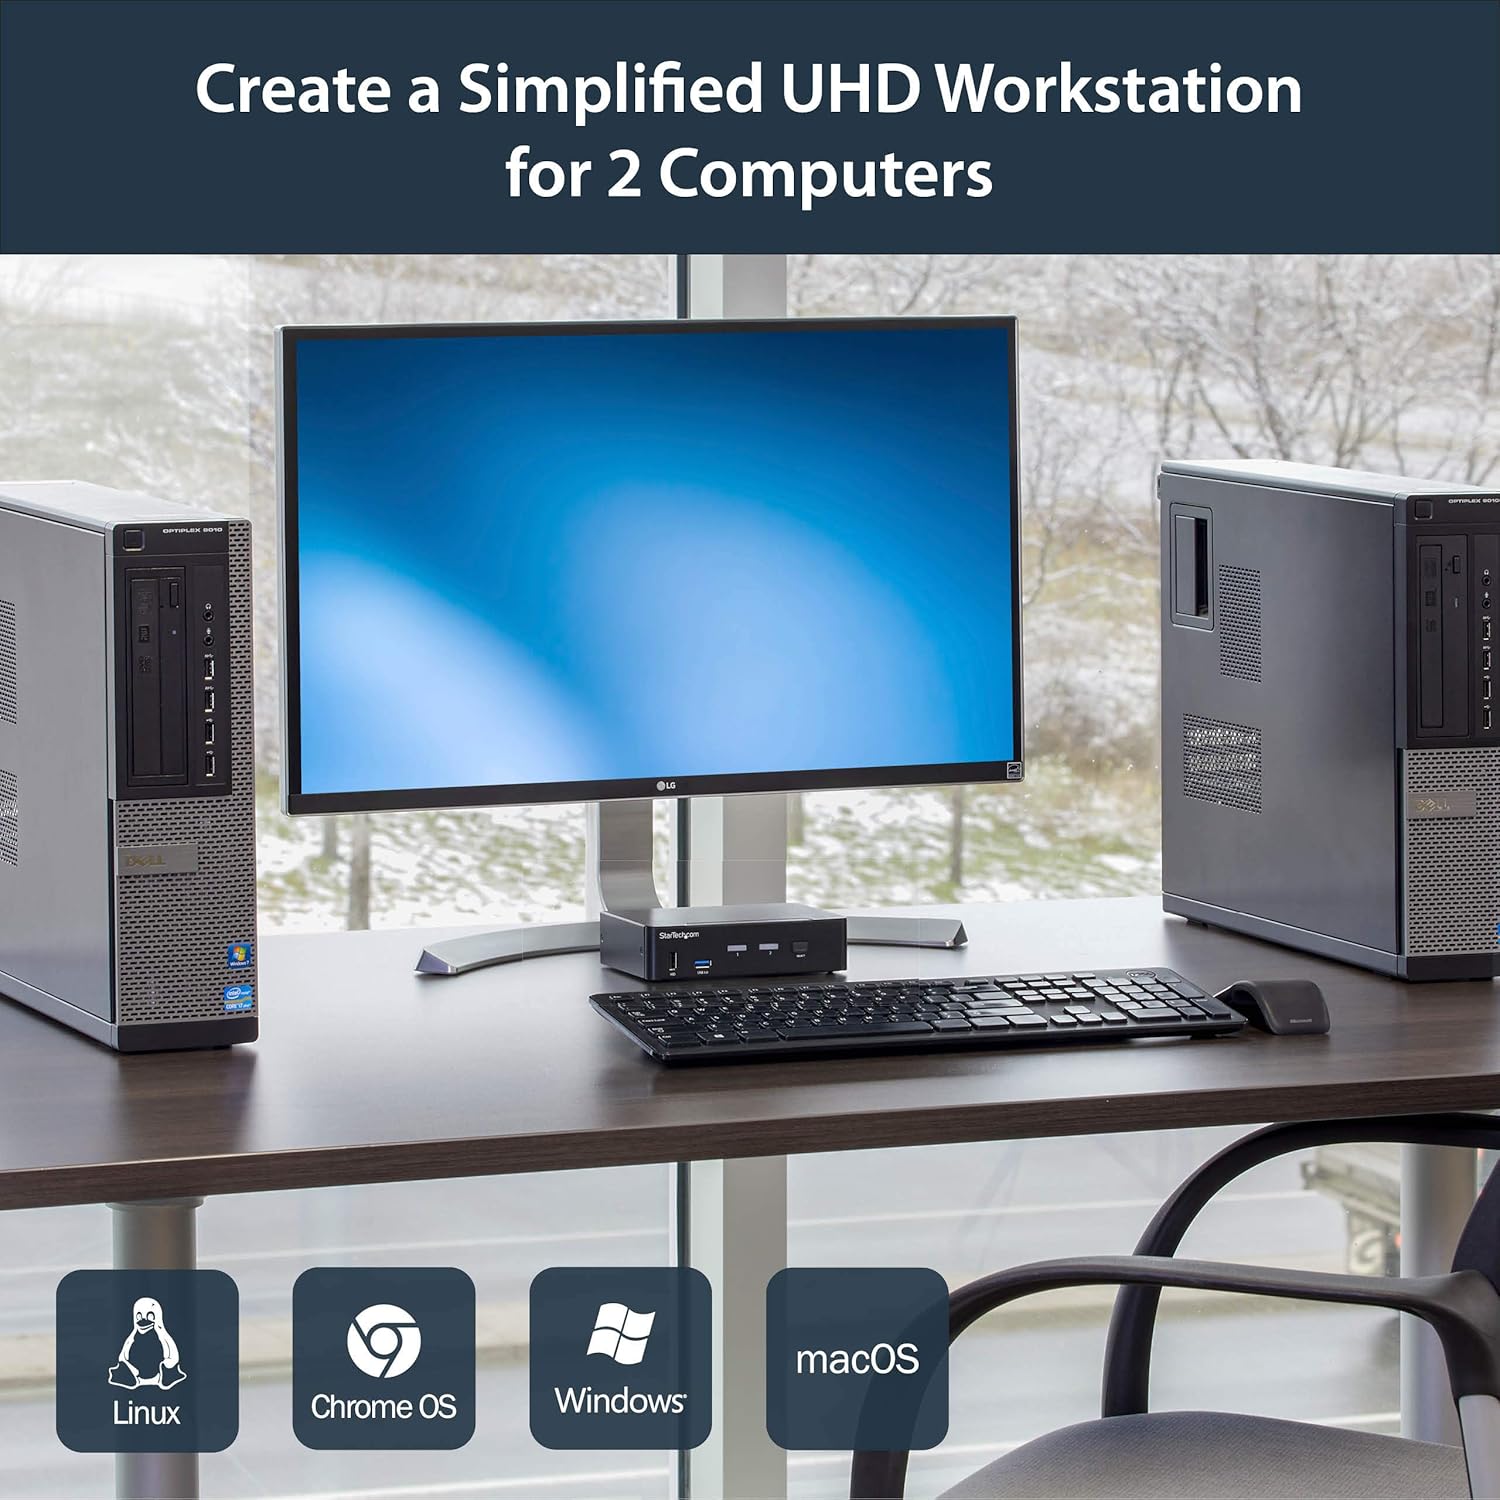
Hình ảnh 4: Connection diagram for the SV231DPU34K KVM Switch, showing how two computers share one display and peripherals.
5. Hướng dẫn vận hành
The SV231DPU34K KVM Switch offers two methods for switching between connected computers:
5.1 Front Panel Push Buttons
Nhấn tương ứng LỰA CHỌN button on the front panel of the KVM switch to switch to the desired computer (PC1 or PC2). The LED indicator for the selected computer will illuminate.
Hình ảnh 5: Front panel with computer selection buttons.
5.2 Chuyển đổi phím tắt
The KVM switch supports hotkey commands for switching between computers. Refer to the quick start guide or the official StarTech.com product page for specific hotkey sequences.
6. Bảo trì
To ensure optimal performance and longevity of your KVM switch, follow these maintenance guidelines:
- Vệ sinh: Keep the device clean and free from dust. Use a soft, dry, lint-free cloth for cleaning. Avoid using liquid or aerosol cleaners.
- Thông gió: Ensure adequate airflow around the KVM switch to prevent overheating. Do not block any ventilation openings.
- Quản lý cáp: Organize cables to prevent strain on ports and accidental disconnections.
- Điều kiện môi trường: Operate the device within its specified temperature and humidity ranges. Avoid extreme temperatures or moisture.
KHAI THÁC. Xử lý sự cố
Nếu bạn gặp sự cố với bộ chuyển mạch KVM, hãy tham khảo các vấn đề và giải pháp thường gặp sau đây:
| Vấn đề | Giải pháp khả thi |
|---|---|
| No display or flickering display after switching. |
|
| Bàn phím hoặc chuột không phản hồi. |
|
| USB 3.0 devices not detected or working intermittently. |
|
| Audio issues (static, no sound). |
|
| G-Sync or FreeSync not working. |
|
8. Thông số kỹ thuật
| Tính năng | Chi tiết |
|---|---|
| Người mẫu | SV231DPU34K |
| Thương hiệu | StarTech.com |
| Giao diện video | Cổng DisplayPort 1.2 |
| Max Resolution | 3840 x 2160 @ 60Hz (4K UHD) |
| MST Passthrough | Được hỗ trợ |
| Bộ chia USB | Trung tâm 2 cổng USB 3.0 |
| Cổng USB HID | 4x USB Type-A (for keyboard/mouse) |
| Âm thanh | 3.5mm Analog Audio Switching |
| Phương pháp chuyển đổi | Push Button, Hotkey |
| Vật liệu | Thép |
| Kích thước (D x R x C) | 3.9 x 6.3 x 1.6 inch (9.9 x 16.0 x 4.1 cm) |
| Trọng lượng sản phẩm | 1.3 pound (0.59 kg) |
| Đầu vào nguồn điện | DC 9-12V, 18 Watts |
| Màu sắc | Đen |
| Nhiệt độ hoạt động | 0°C đến 40°C (32°F đến 104°F) |
| Nhiệt độ lưu trữ | -20°C đến 60°C (-4°F đến 140°F) |
| Độ ẩm | 0-80% RH (không ngưng tụ) |
9. Bảo hành và Hỗ trợ
9.1 Thông tin bảo hành
This StarTech.com product is backed by a Bảo hành 2 năm. For detailed warranty terms and conditions, please refer to the official StarTech.com webđịa điểm.
9.2 Hỗ trợ kỹ thuật
For technical assistance, product documentation, or driver downloads, please visit the official StarTech.com support webđịa điểm: