1. Kết thúcview
The HyperX Cloud II is a high-performance gaming headset designed for comfort and superior audio quality across multiple platforms. It features virtual 7.1 surround sound, large 53mm drivers, and a durable aluminum frame. The headset is equipped with comfortable memory foam ear cushions and a detachable noise-cancelling microphone for clear communication.

Image 1: The HyperX Cloud II Gaming Headset in Gun Metal, showcasinVới thiết kế và micro có thể tháo rời.
Video 1: An official product video highlighting the key features and design of the HyperX Cloud II Gaming Headset.
2. Có gì trong hộp
- Tai nghe chơi game HyperX Cloud II
- Micrô khử tiếng ồn có thể tháo rời
- USB Sound Card Audio Control Box
- Cáp mở rộng máy tính
- Hướng dẫn bắt đầu nhanh
- Additional Velour Ear Cushions (pre-installed are leatherette)
3. Thiết lập
3.1 Kết nối tai nghe
- Connect the detachable microphone to the headset's microphone port on the left ear cup.
- For PC and Mac, connect the headset's 3.5mm jack to the USB Sound Card Audio Control Box. Then, plug the USB connector of the control box into an available USB port on your computer.
- For PS4, Xbox One, Nintendo Switch, and mobile devices, connect the headset's 3.5mm jack directly to the controller or device's audio port. The USB Sound Card Audio Control Box is not typically used for these connections for optimal stereo sound.

Image 2: A diagram illustrating the multi-platform compatibility of the HyperX Cloud II, showing USB connection for PC/Playstation/Nintendo Switch and 3.5mm connection for Xbox Controller/Mobile/VR.
3.2 Configuring 7.1 Virtual Surround Sound (PC/Mac)
The HyperX Cloud II features a USB sound card audio control box that enables virtual 7.1 surround sound on PC and Mac. Follow these steps to ensure proper configuration:
Đối với Windows:
- Open the Control Panel and navigate to 'Hardware and Sound', then select 'Sound'.
- In the 'Playback' tab, locate 'HyperX 7.1 Audio' (or 'USB Audio'). If it's not the default device, right-click and select 'Set as Default Device'. A green checkmark will appear.
- Repeat the same steps for the microphone under the 'Recording' tab, selecting 'HyperX 7.1 Audio' (or 'USB Audio') as the default input device.
Đối với máy Mac:
- Click the Apple menu and select 'System Preferences'.
- Click on the 'Sound' icon.
- In the 'Input' tab, select 'HyperX 7.1 Audio' (or 'USB Audio') for default sound input.
- In the 'Output' tab, select 'HyperX 7.1 Audio' (or 'USB Audio') for default sound output.
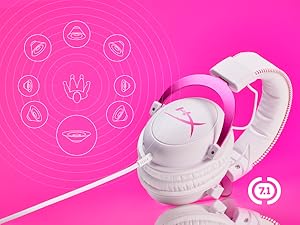
Image 3: The HyperX Cloud II headset with an overlay indicating its 7.1 virtual surround sound capability.
4. Vận hành Tai nghe
4.1 Audio Control Box Functions
The USB Sound Card Audio Control Box provides convenient access to audio settings:
- Điều khiển âm lượng tai nghe: Use the '+' and '-' buttons on the left side to adjust headphone volume.
- Điều khiển âm lượng micrô: Use the '+' and '-' buttons on the right side to adjust microphone volume.
- 7.1 Chế độ âm thanh vòm: Press the '7.1' button in the center to activate or deactivate virtual 7.1 surround sound.
- Tắt tiếng micrô: Use the switch on the side of the control box to quickly mute or unmute the microphone.
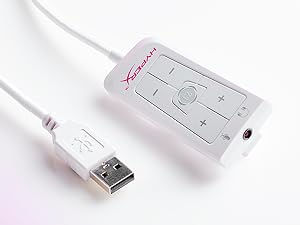
Image 4: The Advanced USB Sound Card Audio Control Box for the HyperX Cloud II headset, showing volume controls and 7.1 surround sound toggle.
4.2 Detachable Microphone
The noise-cancelling microphone can be detached when not needed, allowing the headset to be used for music listening or other audio without the microphone boom in the way.

Hình ảnh 5: Cận cảnh view of the HyperX Cloud II's detachable, noise-cancelling microphone.
5. Bảo trì
5.1 Thay thế đệm tai
The HyperX Cloud II comes with both leatherette and velour ear cushions. These are replaceable, allowing you to maintain comfort and hygiene over time. To replace, gently pull off the existing ear cushions and press the new ones onto the ear cups until securely attached.
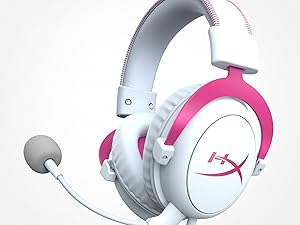
Image 6: The HyperX Cloud II headset highlighting its comfortable memory foam ear cushions.
Video 2: A video demonstrating the memory foam ear cushions of the HyperX Cloud II headset, emphasizing their comfort and flexibility.
5.2 Chăm sóc chung
- Khi không sử dụng, hãy bảo quản tai nghe ở nơi sạch sẽ, khô ráo.
- Tránh để tai nghe tiếp xúc với nhiệt độ hoặc độ ẩm quá cao.
- Lau sạch phần đệm tai và băng đô bằng khăn mềm.amp vải. Không sử dụng hóa chất mạnh.
KHAI THÁC. Xử lý sự cố
6.1 No Audio or Microphone Function
- Kiểm tra kết nối: Ensure all cables (3.5mm jack, USB) are securely connected to the headset, control box, and device.
- Default Audio Device: Verify that 'HyperX 7.1 Audio' (or 'USB Audio') is set as the default playback and recording device in your operating system's sound settings (refer to Section 3.2 for detailed steps).
- Mức âm lượng: Check both the headset's volume controls on the audio control box and your device's system volume. Ensure the microphone is not muted.
- Microphone Detached: Confirm the detachable microphone is fully inserted into its port.
7. Thông số kỹ thuật
| Tính năng | Đặc điểm kỹ thuật |
|---|---|
| Thương hiệu | HyperX |
| Số hiệu mẫu | KHX-HSCP-GM |
| Màu sắc | Súng kim loại |
| Vị trí tai | Trên tai |
| Trở kháng | 60 Ohm |
| Đáp ứng tần số | 15-25kKhz |
| Kích thước trình điều khiển âm thanh | 53 milimét |
| Kiểm soát tiếng ồn | Khử tiếng ồn thụ động |
| Công nghệ kết nối | Wired (3.5 mm Jack, USB) |
| Thiết bị tương thích | PC, Mac, PS4, PS5, Xbox Series X|S, Xbox One, Nintendo Switch, Mobile, VR |
| Vật liệu | Aluminum, Faux Leather |
| Trọng lượng sản phẩm | 11.29 Ounce |
8. Bảo hành và Hỗ trợ
For detailed warranty information and technical support, please refer to the official HyperX webtrang web hoặc thẻ bảo hành đi kèm sản phẩm của bạn. Bạn cũng có thể truy cập Cửa hàng HyperX trên Amazon để có thêm nguồn lực.