Thank you for choosing the AMS Pendule 211/1 wall clock. This manual provides comprehensive instructions for the safe and efficient setup, operation, and maintenance of your new clock. Please read this manual thoroughly before use and retain it for future reference.
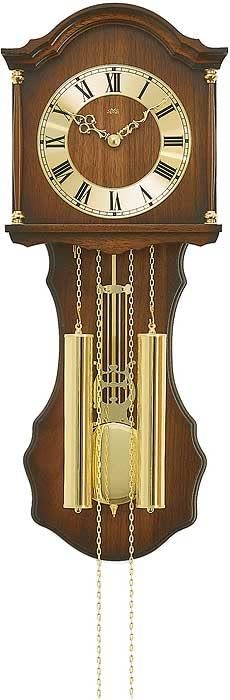
Figure 1: AMS Pendule 211/1 Wall Clock
2. Thiết lập
2.1 Tháo dỡ
Cẩn thận lấy đồng hồ ra khỏi bao bì.
Inspect the clock for any signs of damage. If damaged, do not proceed with setup and contact customer support.
Remove all protective films or packaging materials from the clock face, hands, and pendulum.
Giữ lại bao bì để vận chuyển hoặc lưu trữ sau này.
2.2 Lắp đặt pin
The AMS Pendule 211/1 requires batteries (not included) for operation. Please use the specified battery type.
Hãy tìm nắp đậy ngăn chứa pin ở mặt sau của đồng hồ.
Remove the cover by sliding or unlatching it.
Insert the required batteries (e.g., 1x AA or 1x C, refer to the compartment label for exact type) according to the polarity indicators (+ and -).
Lắp lại nắp ngăn chứa pin một cách an toàn.
2.3 Lắp đặt đồng hồ
Ensure the clock is mounted securely on a stable wall surface.
Choose a suitable location on a wall, away from direct sunlight, extreme temperatures, or vibrations.
Use an appropriate wall anchor and screw for your wall type (e.g., drywall, concrete). The mounting point should be strong enough to support the clock's weight.
Hang the clock securely using the keyhole slot on the back. Ensure it is level.
2.4 Đặt thời gian
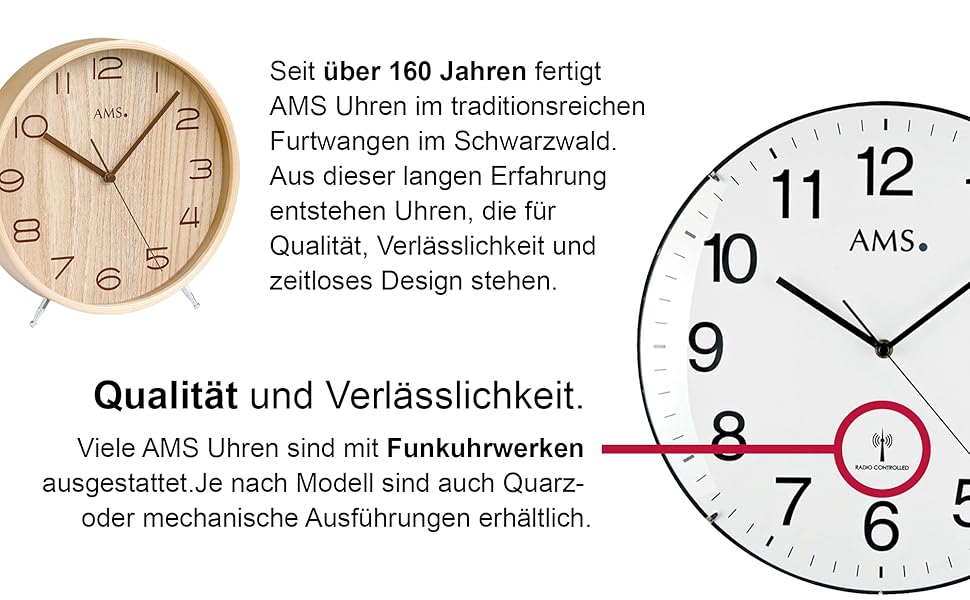
Your AMS Pendule 211/1 clock features an analog display. Some models may include a radio-controlled mechanism for automatic time synchronization.
Hình 2: Ví dụample Clock Face with Radio Controlled Symbol
Cài đặt thủ công: Locate the time-setting knob or wheel on the back of the clock. Gently turn this knob to move the minute and hour hands clockwise until the correct time is displayed. Avoid turning the hands counter-clockwise.
Radio-Controlled (if applicable): If your clock is radio-controlled, it will attempt to synchronize with a time signal after battery installation. Place the clock near a window for better signal reception. This process may take several minutes or hours. Once synchronized, the clock will automatically display the correct time.
2.5 Thiết lập con lắc
The pendulum is a decorative and functional element of your clock.
Carefully unpack the pendulum if it was separate from the main clock body.
Attach the pendulum to its hook or hanging mechanism inside the clock case. Ensure it hangs freely and does not touch the sides of the case.
Gently push the pendulum to one side to start its swing. It should swing evenly.
3. Hướng dẫn vận hành
3.1 Đọc giờ
The AMS Pendule 211/1 features a clear analog display with hour, minute, and second hands for precise timekeeping.
Các short hand indicates the hour.
Các long hand indicates the minute.
Các thin sweeping hand indicates the second.
3.2 chức năng báo thức
Your clock is equipped with an alarm function. Refer to the specific controls on the back or side of your clock for alarm setting.
Đặt thời gian báo thức: Locate the alarm setting knob/dial (often separate from the main time setting). Turn it to set the desired alarm time.
Kích hoạt báo động: Find the alarm ON/OFF switch or button. Move it to the "ON" position to activate the alarm.
Tắt báo động: To turn off the alarm sound, move the alarm switch to the "OFF" position.
3.3 Pendulum Operation
Once the pendulum is installed and started, it should swing continuously. If it stops, gently restart it.
Ensure the clock is level on the wall to allow for an even pendulum swing.
Avoid obstructing the pendulum's movement.
4. Bảo trì
4.1 Vệ sinh
Regular cleaning will help maintain the appearance of your clock. The frame is made of Acrylonitrile Butadiene Styrene (ABS).
Wipe the clock's exterior with a soft, dry, lint-free cloth.
Đối với các vết bẩn cứng đầu, hãy chà nhẹampLau vải bằng nước. Tránh sử dụng hóa chất mạnh, chất tẩy rửa mài mòn hoặc dung môi vì chúng có thể làm hỏng lớp hoàn thiện.
Do not spray cleaning solutions directly onto the clock.
Keep the clock away from excessive dust and moisture.
4.2 Thay thế pin
Replace batteries when the clock starts losing time or stops functioning.
Follow the steps in Section 2.2 "Battery Installation" to replace old batteries with new ones of the correct type.
Vứt bỏ pin đã qua sử dụng một cách có trách nhiệm theo quy định của địa phương.
KHAI THÁC. Xử lý sự cố
If you encounter issues with your AMS Pendule 211/1, refer to the table below for common problems and solutions.
Replace batteries. For radio-controlled, move to a location with better signal. If problem persists, contact support.
Con lắc không đung đưa
Lắp đặt không đúng cách; có vật cản; đồng hồ không thẳng hàng.
Ensure pendulum is correctly hooked and swings freely. Check if the clock is level. Gently restart the pendulum.
Báo thức không kêu
Alarm not activated; incorrect alarm time set; low battery.
Ensure alarm switch is ON. Verify alarm time setting. Replace batteries.
6. Thông số kỹ thuật
Tính năng
Chi tiết
Thương hiệu
AMS
Người mẫu
211/1
ASIN
B005DRWNZ0
Kiểu hiển thị
Tương tự
Hình dạng
Hình chữ nhật
Vật liệu khung
Acrylonitrile Butadiene Styrene (ABS)
Báo thức
Đúng
Bao gồm pin
KHÔNG
7. Bảo hành và Hỗ trợ
Để biết thông tin bảo hành hoặc hỗ trợ kỹ thuật, vui lòng tham khảo tài liệu đi kèm khi mua hàng hoặc liên hệ với nhà bán lẻ. Vui lòng giữ lại hóa đơn mua hàng để được hỗ trợ bảo hành.
For further assistance, you may visit the official AMS webtrang web hoặc liên hệ với bộ phận dịch vụ khách hàng của họ.
Ask a question about this manual
Ask about setup, troubleshooting, compatibility, parts, safety, or missing instructions. Manuals+ will review the question and use this page’s manual context to help answer it.